<?xml version="1.0" encoding="utf-8"?><feed xmlns="http://www.w3.org/2005/Atom" xml:lang="en-GB"><generator uri="https://jekyllrb.com/" version="3.10.0">Jekyll</generator><link href="https://www.druewilding.com/feed.xml" rel="self" type="application/atom+xml" /><link href="https://www.druewilding.com/" rel="alternate" type="text/html" hreflang="en-GB" /><updated>2026-11-17T22:47:19+00:00</updated><id>https://www.druewilding.com/feed.xml</id><title type="html">Drue Wilding</title><subtitle>Test engineer and developer in Copenhagen, making weird and wonderful things.</subtitle><author><name>Drue Wilding</name></author><entry><title type="html">I redesigned my site, and now it’s a different colour every day</title><link href="https://www.druewilding.com/2026/11/17/redesigning-my-site.html" rel="alternate" type="text/html" title="I redesigned my site, and now it’s a different colour every day" /><published>2026-11-17T00:00:00+00:00</published><updated>2026-11-17T00:00:00+00:00</updated><id>https://www.druewilding.com/2026/11/17/redesigning-my-site</id><content type="html" xml:base="https://www.druewilding.com/2026/11/17/redesigning-my-site.html"><![CDATA[<p>My site had been wearing the same outfit for years. It was a perfectly nice outfit (the Cayman theme for Jekyll, with a blue-to-green gradient) but it didn’t really look like <em>me</em>.</p>

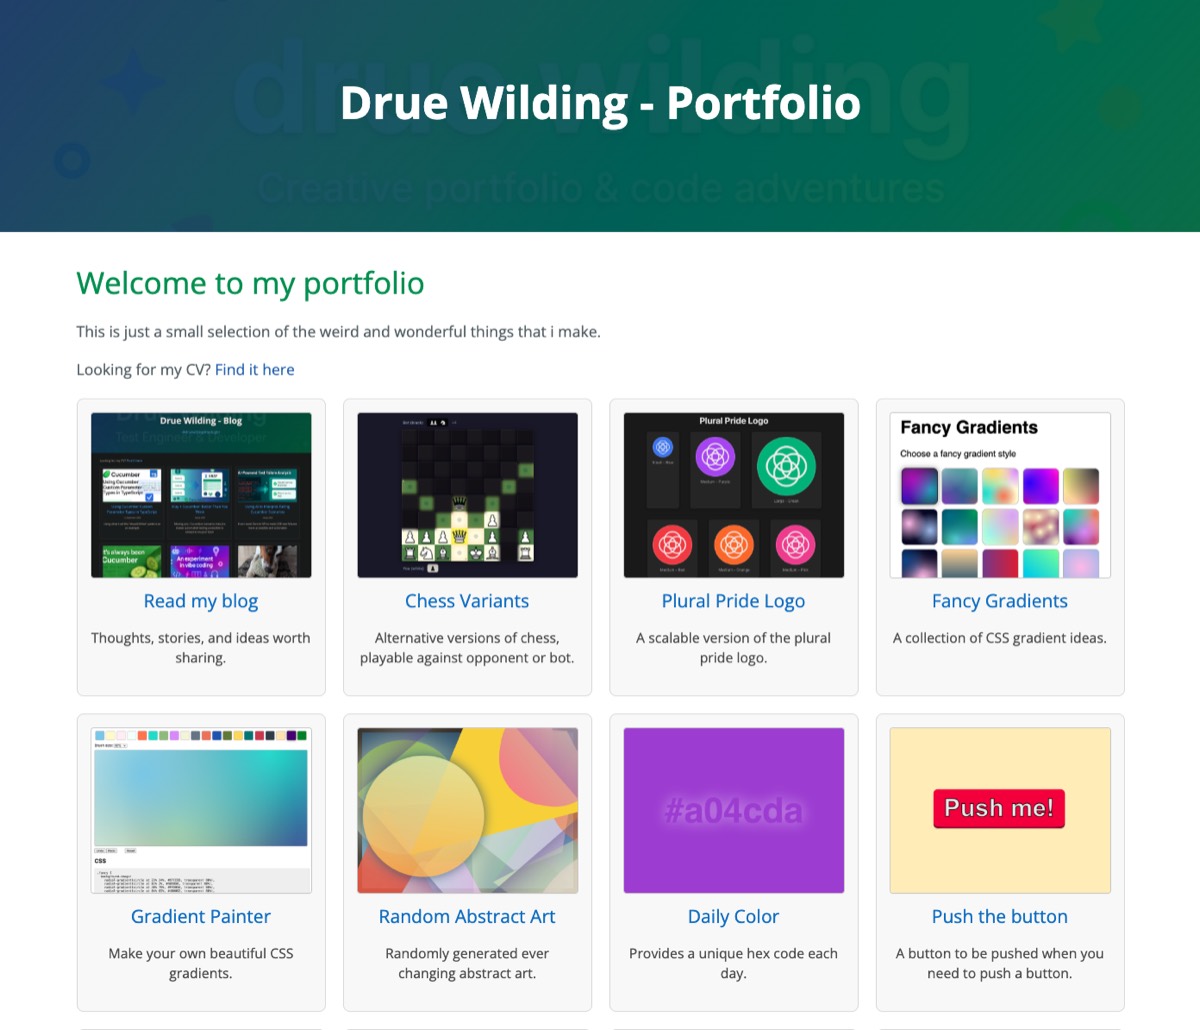
<p><img src="/assets/images/site-redesign/before-portfolio.jpg" alt="The old portfolio: a blue-green header and a grid of identical cards" /></p>

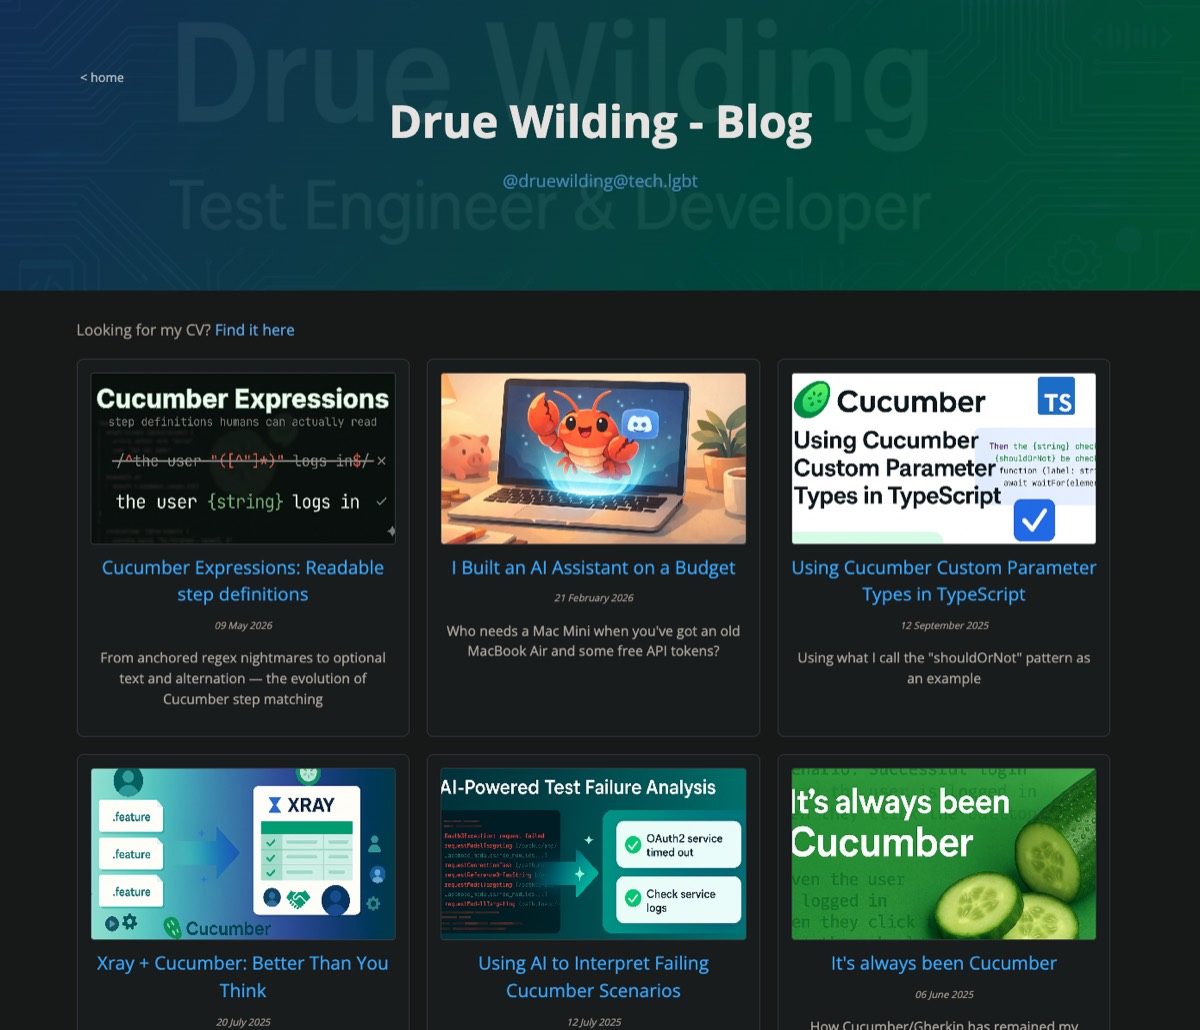
<p><img src="/assets/images/site-redesign/before-blog.jpg" alt="The old blog: the same header, darkened by a browser extension" /></p>

<p>Every card was the same size and the same grey. A deep dive into Cucumber had exactly the same weight as a crochet ball for my dog. Dark mode was done by a script called DarkReader, which recolours the page <em>after</em> it has loaded, so you’d get a flash of white and some slightly odd colours.</p>

<p>So i spent an evening redesigning it with <a href="https://claude.com/claude-code">Claude Code</a>. I said what i wanted (and, mostly, what i <em>didn’t</em> want), Claude built it, and i nitpicked until i was happy. This is how it went.</p>

<h2 id="the-big-idea-a-new-colour-every-day">The big idea: a new colour every day</h2>

<p>A while ago i made <a href="/daily-color/">Daily Color</a>, which turns today’s date into a hex code. Every day gets its own colour, and everyone in the world sees the same one.</p>

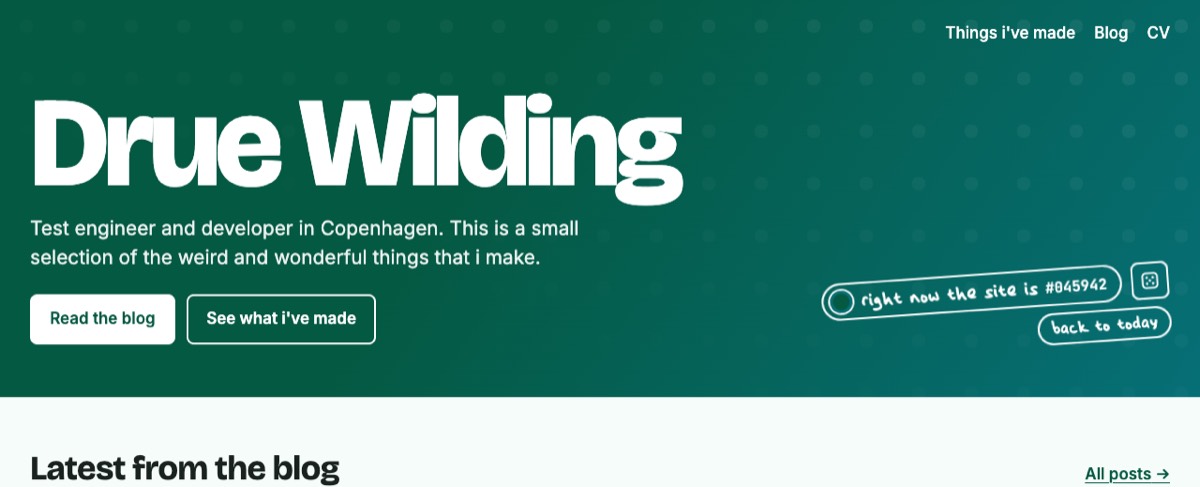
<p>What if the whole site wore that colour? (The picture at the top of this post is the homepage on six different days.)</p>

<p>The catch is that the daily colour can be <em>anything</em>. Some days it’s a pale peach, some days it’s nearly black, and some days it’s a neon green that could guide aircraft in to land. Whatever the colour, the text still has to be readable.</p>

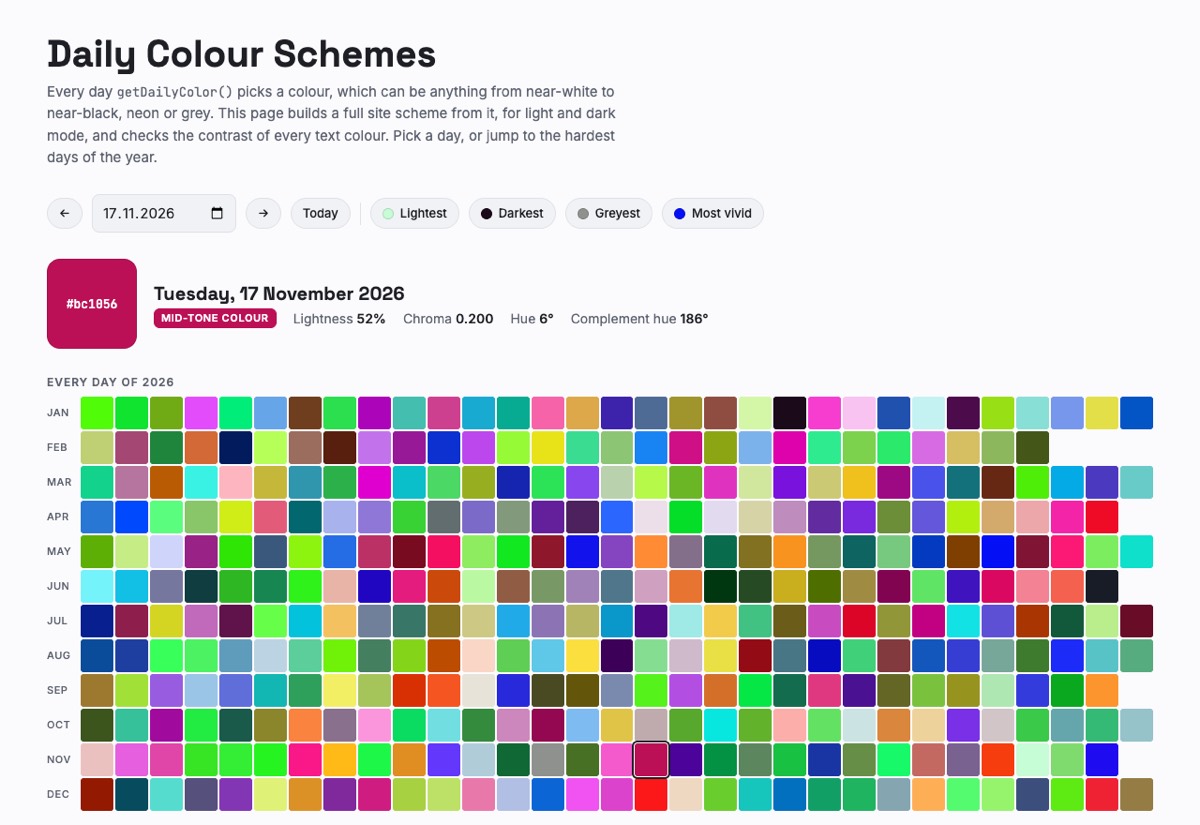
<p>Before touching the site, we built a little explorer page to try the idea against every day of the year:</p>

<p><img src="/assets/images/site-redesign/colour-explorer.jpg" alt="A tool showing every day of 2026 as a colour, with a mini version of the site in light and dark mode" /></p>

<p>The rules we ended up with:</p>

<ul>
  <li><strong>The header is today’s exact colour</strong>, with black or white text, whichever is easier to read.</li>
  <li><strong>Links and buttons use the same hue</strong>, made lighter or darker only as much as they need to be to stay readable (a contrast of at least 4.5:1, which is what the WCAG accessibility guidelines ask for).</li>
  <li><strong>A second colour comes from the opposite side of the colour wheel</strong>, for tags and little handwritten notes.</li>
  <li><strong>Backgrounds get a faint tint</strong> of today’s colour, so the whole page shifts, not just the links.</li>
  <li><strong>Light or dark mode follows your own setting.</strong> The daily colour just decides the details.</li>
</ul>

<p>We checked every single day of 2026 and 2027, in both light and dark mode, and every bit of text passed. The script runs before the page is drawn, so there’s no flash of the wrong colour. Goodbye, DarkReader!</p>

<h2 id="building-it">Building it</h2>

<p>I wanted to stay on Jekyll and GitHub Pages, so the site is still plain old Markdown files. The difference is that it now has its own theme, built on <a href="/klods/">klods</a>, my tiny component library.</p>

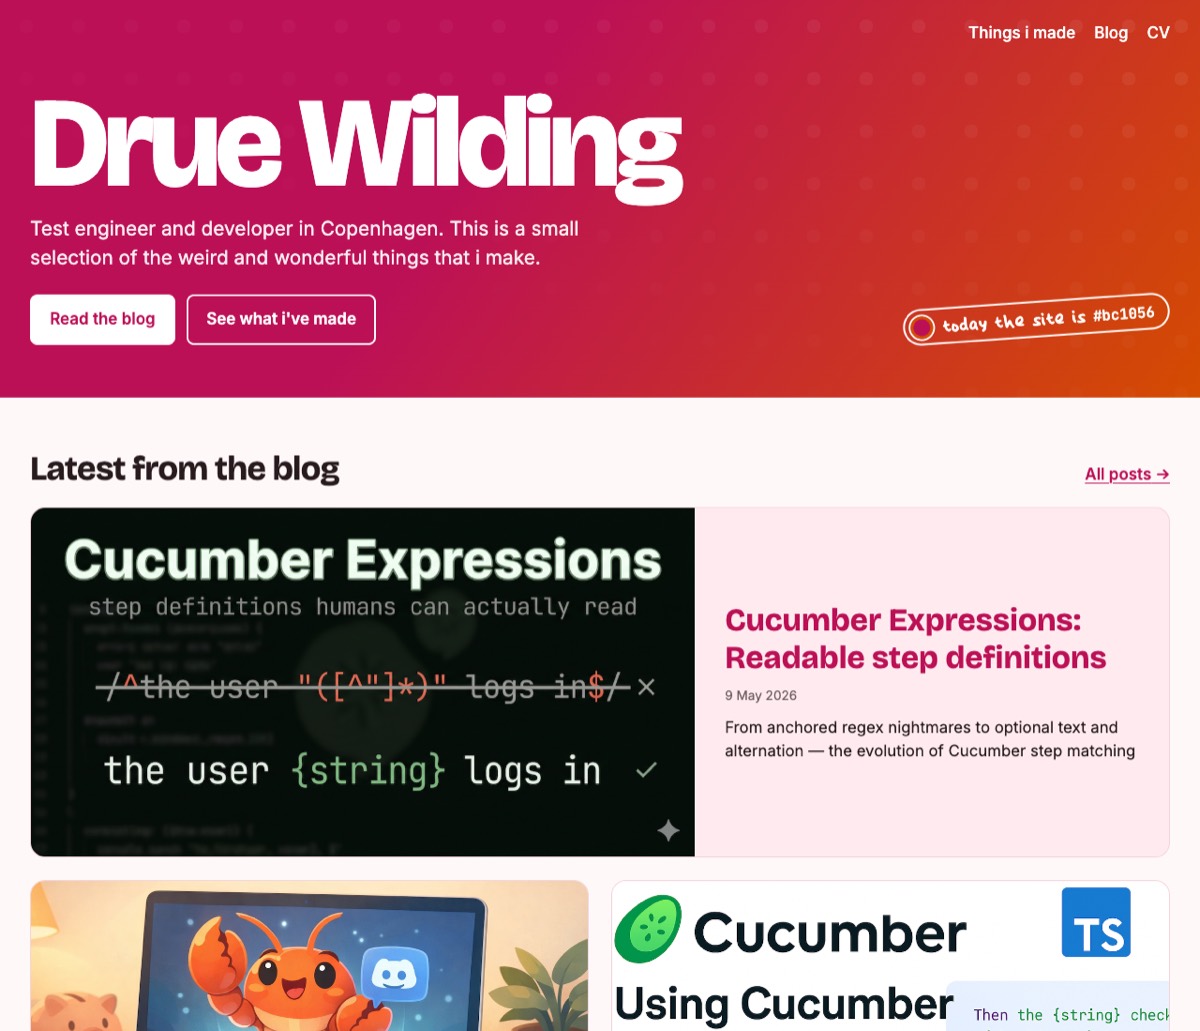
<p>Here’s the first version:</p>

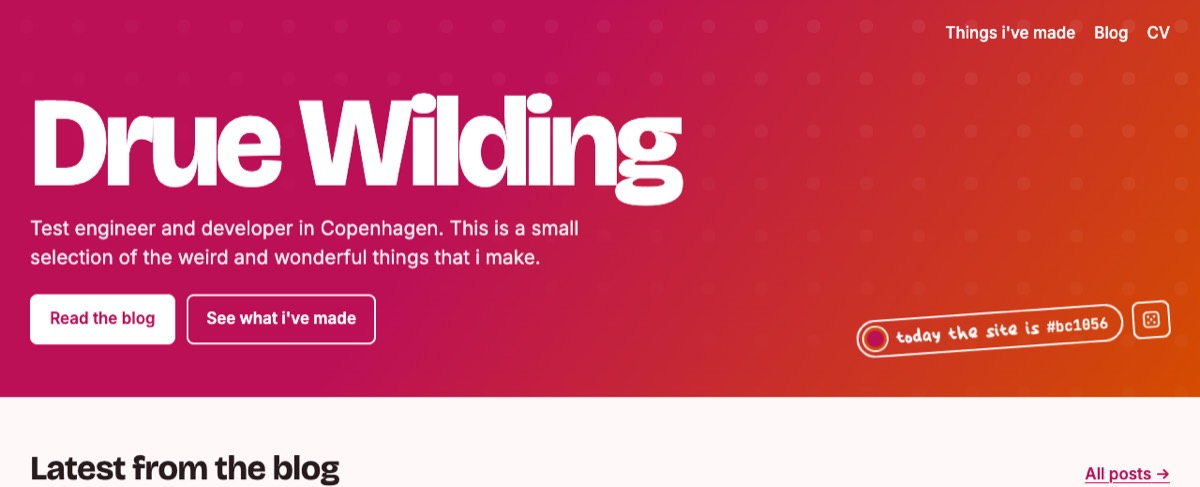
<p><img src="/assets/images/site-redesign/first-version.jpg" alt="The first version of the new homepage: a huge &quot;Drue Wilding&quot; heading on a raspberry header, and big blog cards" /></p>

<p>There’s a big chunky heading, and blog cards with proper images. The “today the site is #bc1056” pill is in my own handwriting, because i <a href="/handwriting/">made my handwriting into a font</a> a while ago and finally had a use for it.</p>

<h2 id="tags-and-a-cucumber-series">Tags and a Cucumber series</h2>

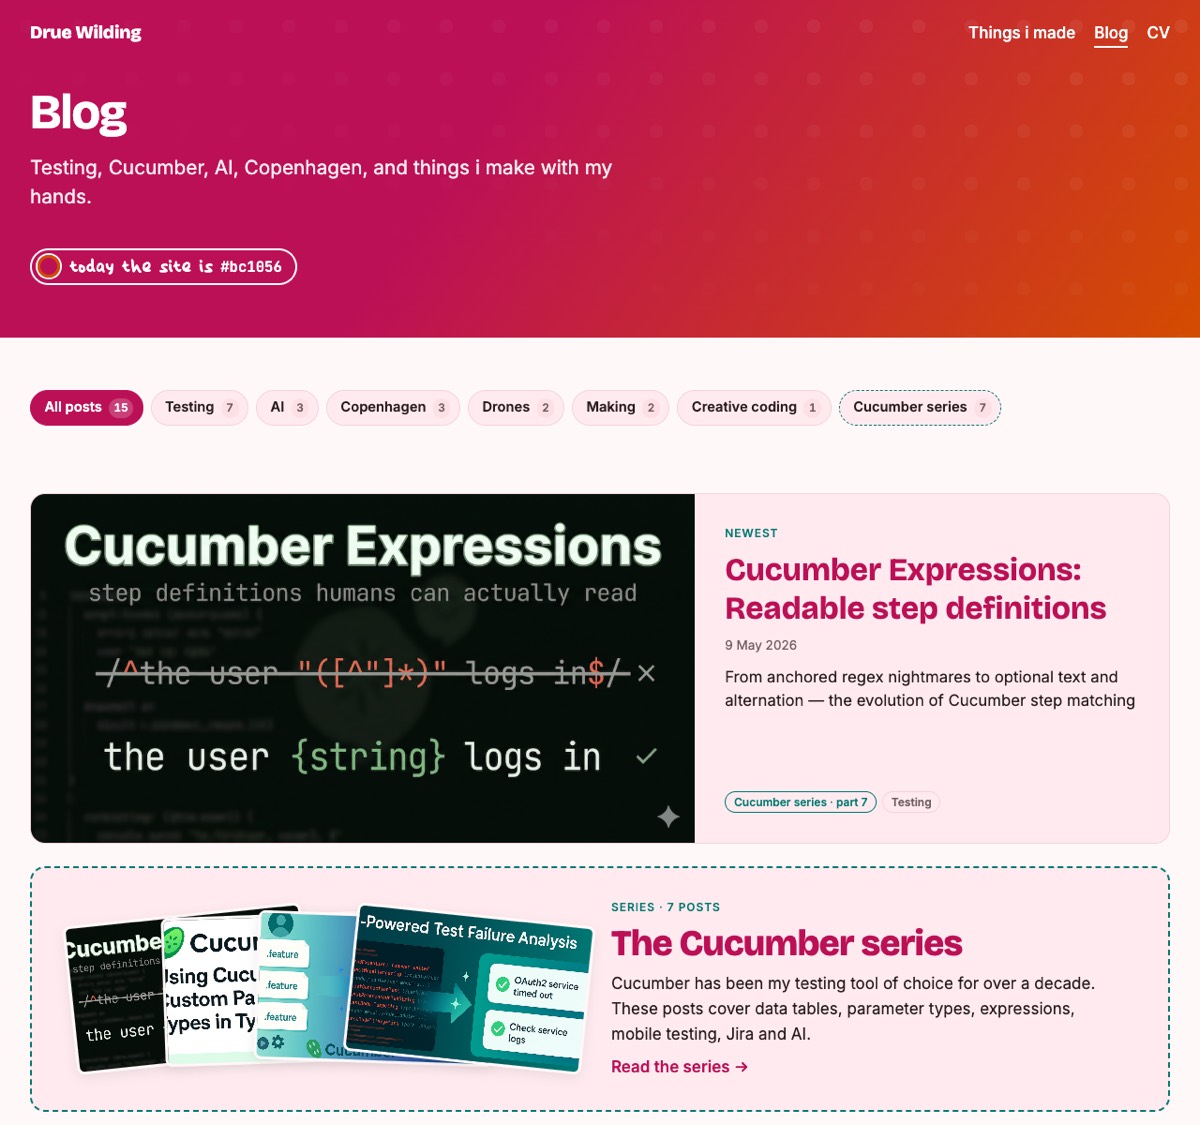
<p>I write about a few quite different things, so the blog now has tags: Testing, AI, Copenhagen, Drones, Making and Creative coding. Seven of my posts are about Cucumber, so they’re now a proper <a href="/blog/cucumber/">series</a>, numbered in order, with a little fan of their cover images on the blog page.</p>

<p><img src="/assets/images/site-redesign/tags-and-series.jpg" alt="The blog with a row of tags, the newest post, and the Cucumber series" /></p>

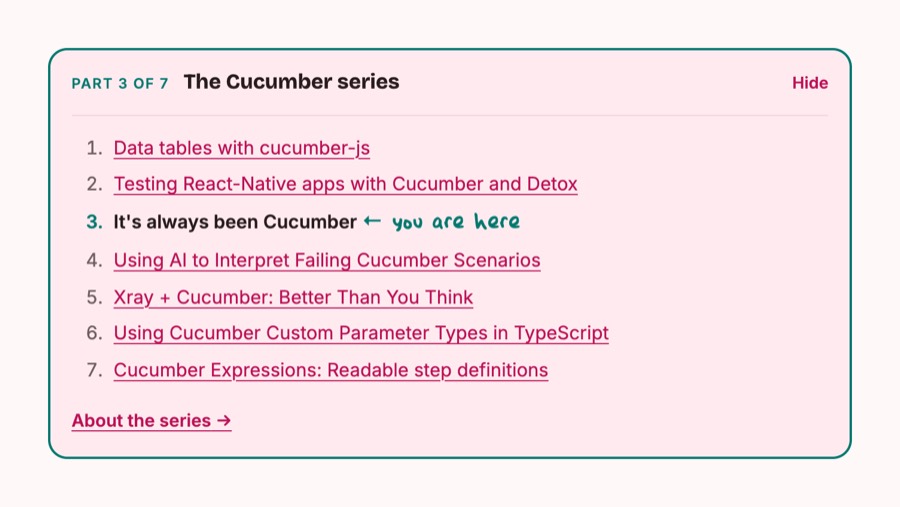
<p>Each post in the series has a box at the top showing where you are, with a handwritten “you are here”:</p>

<p><img src="/assets/images/site-redesign/series-box.jpg" alt="The list of posts in the Cucumber series, with a handwritten &quot;you are here&quot;" /></p>

<h2 id="notes-that-hang-off-the-edge">Notes that hang off the edge</h2>

<p>Some tiles in the portfolio have little handwritten notes on them. At first they sat politely inside the box:</p>

<p><img src="/assets/images/site-redesign/notes-before.jpg" alt="A note sitting inside the corner of a tile" /></p>

<p>I wanted them to hang over the edge, like a sticky note someone slapped on:</p>

<p><img src="/assets/images/site-redesign/notes-after.jpg" alt="Notes hanging off the corners of the tiles" /></p>

<p>Tilting them gave me jagged edges, though. Browsers aren’t very good at drawing thin lines at an angle. I didn’t need to know <em>why</em>; i just said what i was seeing (“the line is a bit jaggedy”), and Claude went off and fixed it. It took a couple of goes, but they’re smooth now.</p>

<h2 id="a-404-page-you-can-play">A 404 page you can play</h2>

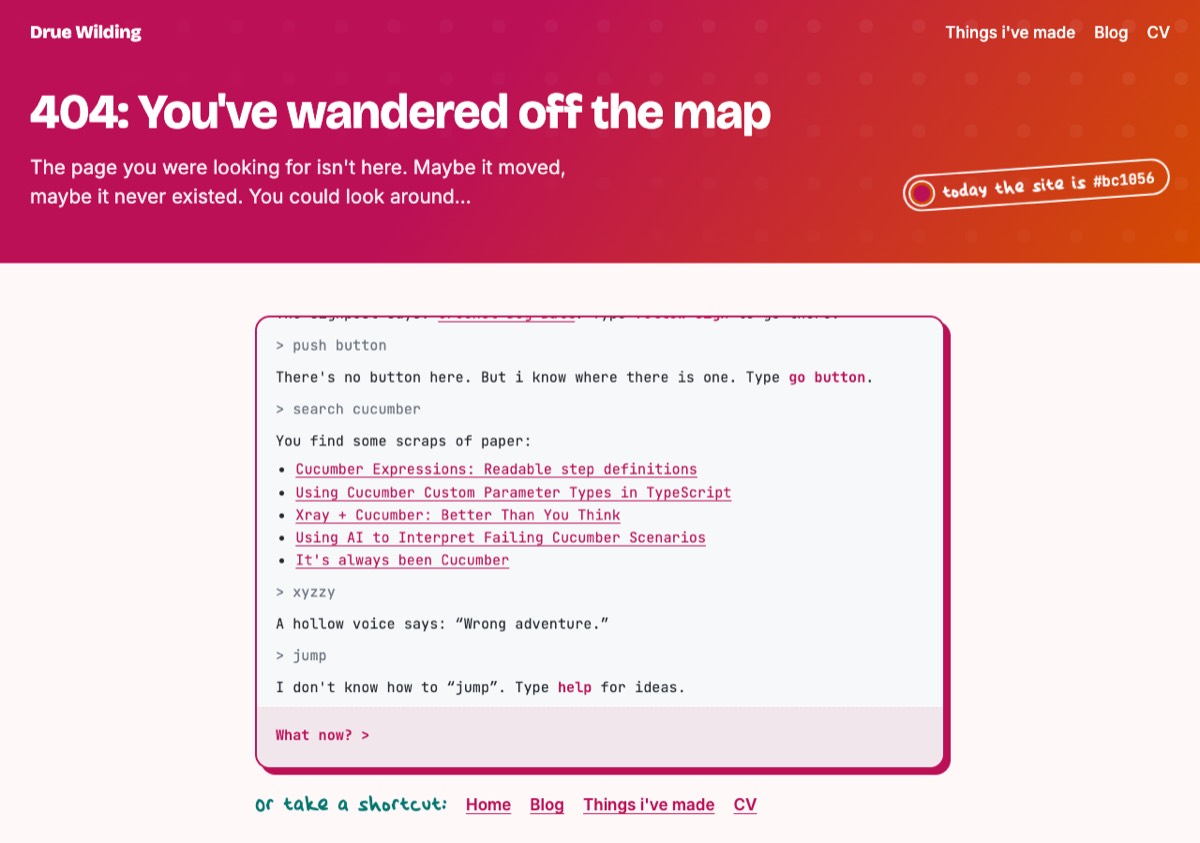
<p>If you go somewhere that doesn’t exist, you now end up in a tiny text adventure. You can look around, pick up a paint chip in today’s colour, and walk through doors back to the rest of the site. If the address you typed looks a bit like one of my posts, a signpost appears and points you to it.</p>

<p><img src="/assets/images/site-redesign/404-adventure.jpg" alt="A text adventure on the 404 page" /></p>

<p><a href="/this-page-does-not-exist/">Go and get lost</a> to try it. (Old adventure game fans: try typing <code class="language-plaintext highlighter-rouge">xyzzy</code>.)</p>

<h2 id="roll-the-dice">Roll the dice</h2>

<p>Then i thought: what if you don’t like today’s colour? So now there’s a dice next to the pill. Click it and the whole site rolls a random colour, with the same rules as before, so it always stays readable.</p>

<p><img src="/assets/images/site-redesign/shuffle-before.jpg" alt="Before rolling: a raspberry header, &quot;today the site is #bc1056&quot;" /></p>

<p><img src="/assets/images/site-redesign/shuffle-after.jpg" alt="After rolling: a deep green header, &quot;right now the site is #045942&quot;" /></p>

<p>The pill changes from “today” to “right now”, and a “back to today” button appears when you want the real colour back. The colour sticks around while you click from page to page, until you close the tab.</p>

<h2 id="merlins-castle-front-and-centre">Merlin’s Castle, front and centre</h2>

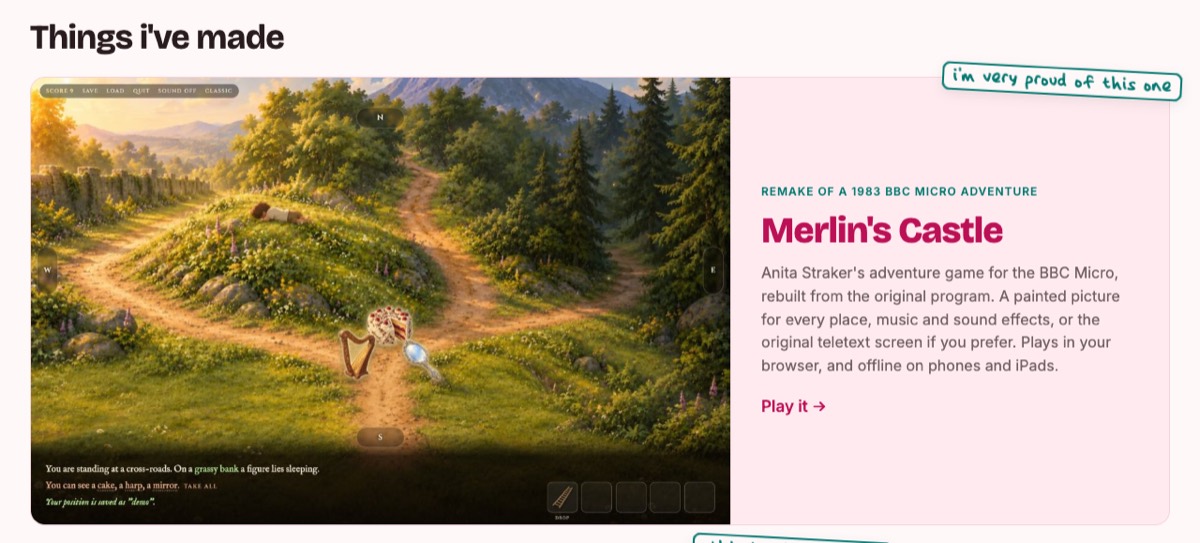
<p>The thing i’m proudest of is my remake of <a href="https://merlinscastle.net/">Merlin’s Castle</a>, the BBC Micro adventure game from 1983, so it now gets the biggest spot on the homepage:</p>

<p><img src="/assets/images/site-redesign/merlins-castle.jpg" alt="Merlin's Castle as a big feature tile, with a painted picture of a crossroads" /></p>

<h2 id="tidying-up">Tidying up</h2>

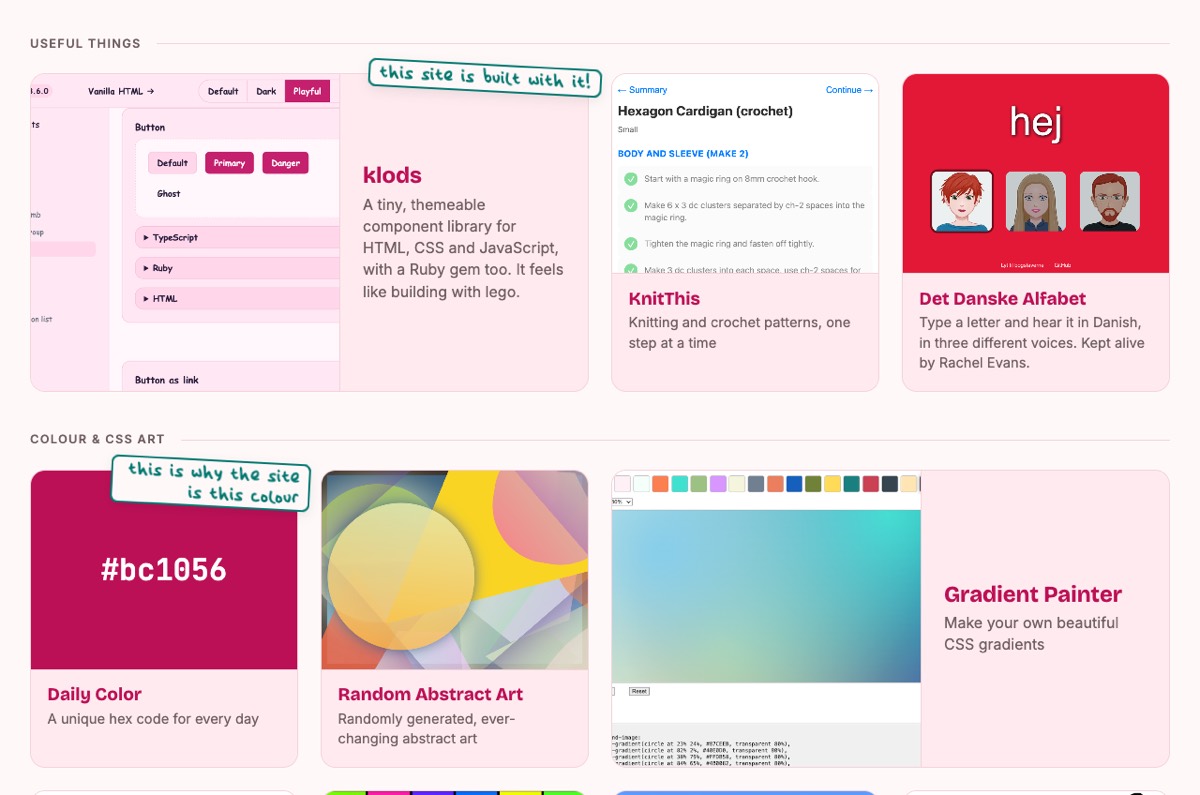
<p>Finally, we added the projects that had been missing (klods, Queermoji, KnitThis and Det Danske Alfabet) and sorted everything into groups, so the page feels less like a pile of things and more like a set of shelves:</p>

<p><img src="/assets/images/site-redesign/things-ive-made.jpg" alt="Projects grouped under &quot;Useful things&quot; and &quot;Colour &amp; CSS art&quot;" /></p>

<h2 id="what-i-learnt">What i learnt</h2>

<ul>
  <li><strong>Start with the idea, not the template.</strong> Once the daily colour was settled, most of the other decisions made themselves.</li>
  <li><strong>Use what you’ve already got.</strong> The colours come from Daily Color, the theme is built on klods, and the notes are written in my own handwriting font. Three side projects that had been sitting on the shelf ended up holding the whole site together.</li>
  <li><strong>Build a tool to test the idea.</strong> Seeing every day of the year at once showed the problems with very pale and very dark days long before they reached the real site.</li>
  <li><strong>Say when something bothers you, even if it’s tiny.</strong> A note stuck inside its box, a link on the wrong words, a full stop at the end of a one-line description. Every one of them was a quick fix once i’d said it out loud.</li>
  <li><strong>Keep the fun bits.</strong> Nobody <em>needs</em> a dice button, or a text adventure on the 404 page, but those are the bits that make it feel like mine.</li>
</ul>

<p>If you don’t like today’s colour, you know what to do. 🎲</p>]]></content><author><name>Drue Wilding</name></author><category term="creative-coding" /><category term="ai" /><summary type="html"><![CDATA[A custom Jekyll theme, a daily colour scheme, a tiny text adventure, and a dice for when you don't like today's colour]]></summary><media:thumbnail xmlns:media="http://search.yahoo.com/mrss/" url="https://www.druewilding.com/assets/images/site-redesign/og-image.jpg" /><media:content medium="image" url="https://www.druewilding.com/assets/images/site-redesign/og-image.jpg" xmlns:media="http://search.yahoo.com/mrss/" /></entry><entry><title type="html">Cucumber Expressions: Readable step definitions</title><link href="https://www.druewilding.com/2026/05/09/cucumber-expressions.html" rel="alternate" type="text/html" title="Cucumber Expressions: Readable step definitions" /><published>2026-05-09T00:00:00+00:00</published><updated>2026-05-09T00:00:00+00:00</updated><id>https://www.druewilding.com/2026/05/09/cucumber-expressions</id><content type="html" xml:base="https://www.druewilding.com/2026/05/09/cucumber-expressions.html"><![CDATA[<p><em>This post assumes you’re familiar with Cucumber and TypeScript.</em></p>

<p>I’m writing this post as much for my future self as for anyone else. I keep forgetting the exact syntax for optional plurals and alternation in Cucumber Expressions, so here’s the definitive reference i wish i’d had years ago.</p>

<h2 id="the-before-times">The before times</h2>

<p>When i first started using Cucumber, i was writing Ruby. Step definitions used regular expressions, and looked like this:</p>

<div class="language-ruby highlighter-rouge"><div class="highlight"><pre class="highlight"><code><span class="no">When</span><span class="p">(</span><span class="sr">/^the user "([^"]*)" logs in with password "([^"]*)"$/</span><span class="p">)</span> <span class="k">do</span> <span class="o">|</span><span class="n">username</span><span class="p">,</span> <span class="n">password</span><span class="o">|</span>
  <span class="n">login_page</span><span class="p">.</span><span class="nf">login</span><span class="p">(</span><span class="n">username</span><span class="p">,</span> <span class="n">password</span><span class="p">)</span>
<span class="k">end</span>
</code></pre></div></div>

<p>That <code class="language-plaintext highlighter-rouge">([^"]*)</code> is a capture group that matches any character except a double quote, zero or more times. It’s not exactly welcoming, is it?</p>

<p>You also had to get the anchors right, with <code class="language-plaintext highlighter-rouge">^</code> at the start, and <code class="language-plaintext highlighter-rouge">$</code> at the end, otherwise the step might match things you didn’t intend.</p>

<p>When i migrated to TypeScript, the regex habit came with me:</p>

<div class="language-typescript highlighter-rouge"><div class="highlight"><pre class="highlight"><code><span class="nx">When</span><span class="p">(</span><span class="sr">/^the user "</span><span class="se">([^</span><span class="sr">"</span><span class="se">]</span><span class="sr">*</span><span class="se">)</span><span class="sr">" logs in with password "</span><span class="se">([^</span><span class="sr">"</span><span class="se">]</span><span class="sr">*</span><span class="se">)</span><span class="sr">"$/</span><span class="p">,</span> <span class="k">async</span> <span class="kd">function</span> <span class="p">(</span><span class="nx">username</span><span class="p">:</span> <span class="kr">string</span><span class="p">,</span> <span class="nx">password</span><span class="p">:</span> <span class="kr">string</span><span class="p">)</span> <span class="p">{</span>
  <span class="k">await</span> <span class="nx">loginPage</span><span class="p">.</span><span class="nx">login</span><span class="p">(</span><span class="nx">username</span><span class="p">,</span> <span class="nx">password</span><span class="p">);</span>
<span class="p">});</span>
</code></pre></div></div>

<p>Different language, same squinting required. The whole thing was a lot of ceremony for something that should have been readable.</p>

<h2 id="cucumber-expressions-arrive">Cucumber Expressions arrive</h2>

<p>Cucumber Expressions launched in September 2016, as a friendlier alternative to regular expressions. The idea was simple: make step definitions readable by people, not just by regex parsers.</p>

<p>The same step definition from above becomes:</p>

<div class="language-typescript highlighter-rouge"><div class="highlight"><pre class="highlight"><code><span class="nx">When</span><span class="p">(</span><span class="dl">"</span><span class="s2">the user {string} logs in with password {string}</span><span class="dl">"</span><span class="p">,</span> <span class="k">async</span> <span class="kd">function</span> <span class="p">(</span><span class="nx">username</span><span class="p">:</span> <span class="kr">string</span><span class="p">,</span> <span class="nx">password</span><span class="p">:</span> <span class="kr">string</span><span class="p">)</span> <span class="p">{</span>
  <span class="k">await</span> <span class="nx">loginPage</span><span class="p">.</span><span class="nx">login</span><span class="p">(</span><span class="nx">username</span><span class="p">,</span> <span class="nx">password</span><span class="p">);</span>
<span class="p">});</span>
</code></pre></div></div>

<p>Much better. The built-in parameter types available are:</p>

<table>
  <thead>
    <tr>
      <th>Expression</th>
      <th>Matches</th>
      <th>TypeScript type</th>
    </tr>
  </thead>
  <tbody>
    <tr>
      <td><code class="language-plaintext highlighter-rouge">{string}</code></td>
      <td>Quoted strings — <code class="language-plaintext highlighter-rouge">"like this"</code> or <code class="language-plaintext highlighter-rouge">'like this'</code></td>
      <td><code class="language-plaintext highlighter-rouge">string</code> (quotes stripped)</td>
    </tr>
    <tr>
      <td><code class="language-plaintext highlighter-rouge">{int}</code></td>
      <td>Integers — <code class="language-plaintext highlighter-rouge">42</code> or <code class="language-plaintext highlighter-rouge">-7</code></td>
      <td><code class="language-plaintext highlighter-rouge">number</code></td>
    </tr>
    <tr>
      <td><code class="language-plaintext highlighter-rouge">{float}</code></td>
      <td>Decimal numbers — <code class="language-plaintext highlighter-rouge">3.14</code></td>
      <td><code class="language-plaintext highlighter-rouge">number</code></td>
    </tr>
    <tr>
      <td><code class="language-plaintext highlighter-rouge">{word}</code></td>
      <td>A single word with no spaces</td>
      <td><code class="language-plaintext highlighter-rouge">string</code></td>
    </tr>
    <tr>
      <td><code class="language-plaintext highlighter-rouge">{}</code></td>
      <td>Anything at all</td>
      <td><code class="language-plaintext highlighter-rouge">string</code></td>
    </tr>
  </tbody>
</table>

<p>One thing worth noting about <code class="language-plaintext highlighter-rouge">{string}</code>: it matches the quoted value in your Gherkin and strips the quotes before passing it to your function. So if your scenario says:</p>

<div class="language-gherkin highlighter-rouge"><div class="highlight"><pre class="highlight"><code><span class="nf">When </span>the user <span class="s">"admin"</span> logs in with password <span class="s">"hunter2"</span>
</code></pre></div></div>

<p>Then your function receives <code class="language-plaintext highlighter-rouge">admin</code> and <code class="language-plaintext highlighter-rouge">hunter2</code> without quotes, which is almost always what you want.</p>

<h2 id="handling-plurals-with-optional-text">Handling plurals with optional text</h2>

<p>For a long time, i didn’t know this existed, so whenever i needed to match both singular and plural, i’d fall back to regex. Something like this:</p>

<div class="language-typescript highlighter-rouge"><div class="highlight"><pre class="highlight"><code><span class="nx">Given</span><span class="p">(</span><span class="sr">/^I have </span><span class="se">(\d</span><span class="sr">+</span><span class="se">)</span><span class="sr"> items</span><span class="se">?</span><span class="sr"> in the basket$/</span><span class="p">,</span> <span class="k">async</span> <span class="kd">function</span> <span class="p">(</span><span class="nx">count</span><span class="p">:</span> <span class="kr">string</span><span class="p">)</span> <span class="p">{</span>
  <span class="k">await</span> <span class="nx">expect</span><span class="p">(</span><span class="nx">basket</span><span class="p">.</span><span class="nx">itemCount</span><span class="p">()).</span><span class="nx">toBe</span><span class="p">(</span><span class="nb">parseInt</span><span class="p">(</span><span class="nx">count</span><span class="p">));</span>
<span class="p">});</span>
</code></pre></div></div>

<p>That <code class="language-plaintext highlighter-rouge">items?</code> makes <code class="language-plaintext highlighter-rouge">s</code> optional in regex — the <code class="language-plaintext highlighter-rouge">?</code> means “zero or one of the preceding character”. It works, but it’s not as readable. Also, the regex treats everything as a string, which means i have to convert the <code class="language-plaintext highlighter-rouge">count</code> to a number in the step.</p>

<p>In Cucumber Expressions, parentheses mean <em>optional text</em>, which is a much more natural fit:</p>

<div class="language-typescript highlighter-rouge"><div class="highlight"><pre class="highlight"><code><span class="nx">Given</span><span class="p">(</span><span class="dl">"</span><span class="s2">I have {int} item(s) in the basket</span><span class="dl">"</span><span class="p">,</span> <span class="k">async</span> <span class="kd">function</span> <span class="p">(</span><span class="nx">count</span><span class="p">:</span> <span class="kr">number</span><span class="p">)</span> <span class="p">{</span>
  <span class="k">await</span> <span class="nx">expect</span><span class="p">(</span><span class="nx">basket</span><span class="p">.</span><span class="nx">itemCount</span><span class="p">()).</span><span class="nx">toBe</span><span class="p">(</span><span class="nx">count</span><span class="p">);</span>
<span class="p">});</span>
</code></pre></div></div>

<p>Matching:</p>

<div class="language-gherkin highlighter-rouge"><div class="highlight"><pre class="highlight"><code><span class="nf">Given </span>I have 1 item in the basket
<span class="nf">Given </span>I have 3 items in the basket
</code></pre></div></div>

<p>You can use parentheses around any optional text, for example:</p>

<div class="language-typescript highlighter-rouge"><div class="highlight"><pre class="highlight"><code><span class="nx">Given</span><span class="p">(</span><span class="dl">"</span><span class="s2">I am logged in( to the app)</span><span class="dl">"</span><span class="p">,</span> <span class="k">async</span> <span class="kd">function</span> <span class="p">()</span> <span class="p">{</span>
  <span class="k">await</span> <span class="nx">expect</span><span class="p">(</span><span class="nx">homePage</span><span class="p">.</span><span class="nx">welcomeMessage</span><span class="p">()).</span><span class="nx">toBeVisible</span><span class="p">();</span>
<span class="p">});</span>
</code></pre></div></div>

<p>Matching:</p>

<div class="language-gherkin highlighter-rouge"><div class="highlight"><pre class="highlight"><code><span class="nf">Given </span>I am logged in
<span class="nf">Given </span>I am logged in to the app
</code></pre></div></div>

<p>Both resolve to the same step function, which can be useful in some situations.</p>

<h2 id="irregular-plurals-with-alternation-syntax">Irregular plurals with alternation syntax</h2>

<p>The <code class="language-plaintext highlighter-rouge">(s)</code> trick works beautifully with most English nouns, but there are always exceptions, like the word “entry” becomes “entries” in plural.</p>

<p>This is where alternation syntax comes in. Added in March 2017, it lets you write two alternatives separated by a slash.</p>

<p>Before i knew about it, i would be writing ugly regex, something like this:</p>

<div class="language-typescript highlighter-rouge"><div class="highlight"><pre class="highlight"><code><span class="nx">Then</span><span class="p">(</span><span class="sr">/^there </span><span class="se">(?:</span><span class="sr">is|are</span><span class="se">)</span><span class="sr"> </span><span class="se">(\d</span><span class="sr">+</span><span class="se">)</span><span class="sr"> entr</span><span class="se">(?:</span><span class="sr">y|ies</span><span class="se">)</span><span class="sr"> in the list$/</span><span class="p">,</span> <span class="k">async</span> <span class="kd">function</span> <span class="p">(</span><span class="nx">count</span><span class="p">:</span> <span class="kr">string</span><span class="p">)</span> <span class="p">{</span>
  <span class="k">await</span> <span class="nx">expect</span><span class="p">(</span><span class="nx">entries</span><span class="p">).</span><span class="nx">toHaveCount</span><span class="p">(</span><span class="nb">parseInt</span><span class="p">(</span><span class="nx">count</span><span class="p">));</span>
<span class="p">});</span>
</code></pre></div></div>

<p>The regex uses <code class="language-plaintext highlighter-rouge">(?:...)</code> for non-capturing groups, since the thing being matched isn’t actually relevant. All of this is a mess.</p>

<p>With alternation in Cucumber Expressions:</p>

<div class="language-typescript highlighter-rouge"><div class="highlight"><pre class="highlight"><code><span class="nx">Then</span><span class="p">(</span><span class="dl">"</span><span class="s2">there is/are {int} entry/entries in the list</span><span class="dl">"</span><span class="p">,</span> <span class="k">async</span> <span class="kd">function</span> <span class="p">(</span><span class="nx">count</span><span class="p">:</span> <span class="kr">number</span><span class="p">)</span> <span class="p">{</span>
  <span class="k">await</span> <span class="nx">expect</span><span class="p">(</span><span class="nx">entries</span><span class="p">).</span><span class="nx">toHaveCount</span><span class="p">(</span><span class="nx">count</span><span class="p">);</span>
<span class="p">});</span>
</code></pre></div></div>

<p>Matching:</p>

<div class="language-gherkin highlighter-rouge"><div class="highlight"><pre class="highlight"><code><span class="nf">Then </span>there is 1 entry in the list
<span class="nf">Then </span>there are 117 entries in the list
</code></pre></div></div>

<p>Note that alternation is purely for matching — the alternatives aren’t passed as parameters to your function. Only <code class="language-plaintext highlighter-rouge">{}</code> syntax creates parameters. That’s worth keeping in mind if you find yourself wanting to branch on which alternative was used; for that, you want a custom parameter type.</p>

<h2 id="when-you-need-even-more--custom-parameter-types">When you need even more — custom parameter types</h2>

<p>There’s one case where Cucumber Expressions on their own aren’t quite enough: when you want the matched text to be transformed into something more useful than a string.</p>

<p>The <code class="language-plaintext highlighter-rouge">{string}</code> type gives you a string. The <code class="language-plaintext highlighter-rouge">{int}</code> type gives you a number. But what if you want a boolean? Or an enum?</p>

<p>I wrote about this in depth in <a href="/2025/09/12/using-cucumber-custom-parameter-types-in-typescript.html">Using Cucumber Custom Parameter Types in TypeScript</a>, using what i call the <code class="language-plaintext highlighter-rouge">shouldOrNot</code> pattern as an example. The short version: you can define your own <code class="language-plaintext highlighter-rouge">{shouldOrNot}</code> parameter type that converts <code class="language-plaintext highlighter-rouge">"should"</code> to <code class="language-plaintext highlighter-rouge">true</code> and <code class="language-plaintext highlighter-rouge">"should not"</code> to <code class="language-plaintext highlighter-rouge">false</code>, giving you a clean boolean in your step function instead of a string you have to check.</p>

<p>Alternation alone gives you the readability in the Gherkin. Custom parameter types give you the clean types in the TypeScript.</p>

<p>For an enum, the pattern is the same — define a parameter type with a regexp that lists the allowed values, and a transformer that converts the matched string into the enum value:</p>

<div class="language-typescript highlighter-rouge"><div class="highlight"><pre class="highlight"><code><span class="kr">enum</span> <span class="nx">Status</span> <span class="p">{</span>
  <span class="nx">Draft</span> <span class="o">=</span> <span class="dl">"</span><span class="s2">draft</span><span class="dl">"</span><span class="p">,</span>
  <span class="nx">Published</span> <span class="o">=</span> <span class="dl">"</span><span class="s2">published</span><span class="dl">"</span><span class="p">,</span>
  <span class="nx">Archived</span> <span class="o">=</span> <span class="dl">"</span><span class="s2">archived</span><span class="dl">"</span><span class="p">,</span>
<span class="p">}</span>

<span class="nx">defineParameterType</span><span class="p">({</span>
  <span class="na">name</span><span class="p">:</span> <span class="dl">"</span><span class="s2">status</span><span class="dl">"</span><span class="p">,</span>
  <span class="na">regexp</span><span class="p">:</span> <span class="sr">/draft|published|archived/</span><span class="p">,</span>
  <span class="na">transformer</span><span class="p">:</span> <span class="p">(</span><span class="na">s</span><span class="p">:</span> <span class="kr">string</span><span class="p">)</span> <span class="o">=&gt;</span> <span class="nx">s</span> <span class="k">as</span> <span class="nx">Status</span><span class="p">,</span>
<span class="p">});</span>
</code></pre></div></div>

<p>Now you can write:</p>

<div class="language-typescript highlighter-rouge"><div class="highlight"><pre class="highlight"><code><span class="nx">Then</span><span class="p">(</span><span class="dl">"</span><span class="s2">the {string} entry should be {status}</span><span class="dl">"</span><span class="p">,</span> <span class="k">async</span> <span class="kd">function</span> <span class="p">(</span><span class="nx">title</span><span class="p">:</span> <span class="kr">string</span><span class="p">,</span> <span class="nx">status</span><span class="p">:</span> <span class="nx">Status</span><span class="p">)</span> <span class="p">{</span>
  <span class="kd">const</span> <span class="nx">entry</span> <span class="o">=</span> <span class="nx">page</span><span class="p">.</span><span class="nx">getByRole</span><span class="p">(</span><span class="dl">"</span><span class="s2">row</span><span class="dl">"</span><span class="p">,</span> <span class="p">{</span> <span class="na">name</span><span class="p">:</span> <span class="nx">title</span> <span class="p">});</span>
  <span class="k">await</span> <span class="nx">expect</span><span class="p">(</span><span class="nx">entry</span><span class="p">.</span><span class="nx">getByTestId</span><span class="p">(</span><span class="dl">"</span><span class="s2">status</span><span class="dl">"</span><span class="p">)).</span><span class="nx">toHaveText</span><span class="p">(</span><span class="nx">status</span><span class="p">);</span>
<span class="p">});</span>
</code></pre></div></div>

<div class="language-gherkin highlighter-rouge"><div class="highlight"><pre class="highlight"><code><span class="nf">Then </span>the <span class="s">"Hello World"</span> entry should be draft
<span class="nf">Then </span>the <span class="s">"Release Notes"</span> entry should be published
</code></pre></div></div>

<p>Your step function gets a proper <code class="language-plaintext highlighter-rouge">Status</code> enum value rather than a raw string, which means TypeScript will tell you if you accidentally handle a status that doesn’t exist.</p>

<h2 id="looking-back">Looking back</h2>

<p>I’ve been using Cucumber for years, and the introduction of Cucumber Expressions quietly removed one of the most common sources of friction. Regex step definitions still work, but i can’t think of a reason i’d reach for one now.</p>

<p>Have you found any particularly elegant uses of optional text or alternation? i’d love to see examples from real test suites.</p>]]></content><author><name>Drue Wilding</name></author><category term="testing" /><summary type="html"><![CDATA[From anchored regex nightmares to optional text and alternation — the evolution of Cucumber step matching]]></summary><media:thumbnail xmlns:media="http://search.yahoo.com/mrss/" url="https://www.druewilding.com/assets/images/cucumber-expressions/og-image.jpg" /><media:content medium="image" url="https://www.druewilding.com/assets/images/cucumber-expressions/og-image.jpg" xmlns:media="http://search.yahoo.com/mrss/" /></entry><entry><title type="html">I Built an AI Assistant on a Budget</title><link href="https://www.druewilding.com/2026/02/21/ai-assistant-on-a-budget.html" rel="alternate" type="text/html" title="I Built an AI Assistant on a Budget" /><published>2026-02-21T00:00:00+00:00</published><updated>2026-02-21T00:00:00+00:00</updated><id>https://www.druewilding.com/2026/02/21/ai-assistant-on-a-budget</id><content type="html" xml:base="https://www.druewilding.com/2026/02/21/ai-assistant-on-a-budget.html"><![CDATA[<p><em>This post assumes you have a Discord account and aren’t afraid of the terminal.</em></p>

<h2 id="the-problem-i-wanted-an-ai-assistant-not-a-second-mortgage">The problem: i wanted an AI assistant, not a second mortgage</h2>

<p>For the past couple of weeks, I’ve been playing around with <a href="https://openclaw.ai/">OpenClaw</a>, an open-source AI assistant framework that runs on your own machine. The idea appealed to me: a personal assistant that lives on my Mac, chats with me on Discord, and helps with everyday tasks.</p>

<p>I didn’t want to spend hundreds of pounds on a new Mac Mini or a fancy GPU setup. I just wanted to see what was possible with what I already had. And I certainly didn’t want to burn loads of money on API access to flagship AI models.</p>

<h2 id="the-solution-old-hardware-free-tokens-and-a-bit-of-terminal-magic">The solution: old hardware, free tokens, and a bit of terminal magic</h2>

<p>As it turns out, you don’t need much to get a decent AI assistant running. Here’s what I used:</p>

<ul>
  <li><strong>An old MacBook Air</strong> — M2 chip, nothing fancy, I reformatted and created a new account.</li>
  <li><strong><a href="https://ollama.com/">Ollama</a></strong> — free API access to cloud models like <a href="https://ollama.com/library/minimax-m2.5">minimax-m2.5</a>. Requests are rate-limited, but I just asked my assistant to keep within the limits.</li>
  <li><strong><a href="https://brave.com/search/api/">Brave Search API</a></strong> — also free, for web searching.</li>
  <li><strong>Electricity</strong> — basically the only ongoing cost.</li>
</ul>

<p>The setup was surprisingly straightforward. I won’t go through every step (plenty of tutorials are available online) but the key insight was that I didn’t need a powerful machine. The actual AI processing happens in the cloud; my MacBook Air just handles the coordination.</p>

<p>One small trick: I asked my assistant to get the Mac to stay awake even with the lid closed. Because it runs locally, it has access to do all the necessary things. It downloaded <a href="https://www.theapplegeek.co.uk/blog/caffeinate">caffeinate</a> and ran the relevant commands.</p>

<h2 id="what-can-it-actually-do">What can it actually do?</h2>

<p>Here’s where it gets fun. Over the past two weeks, my little assistant (who I’ve named <em>Clawby</em> 🦞) has been helping out with:</p>

<ul>
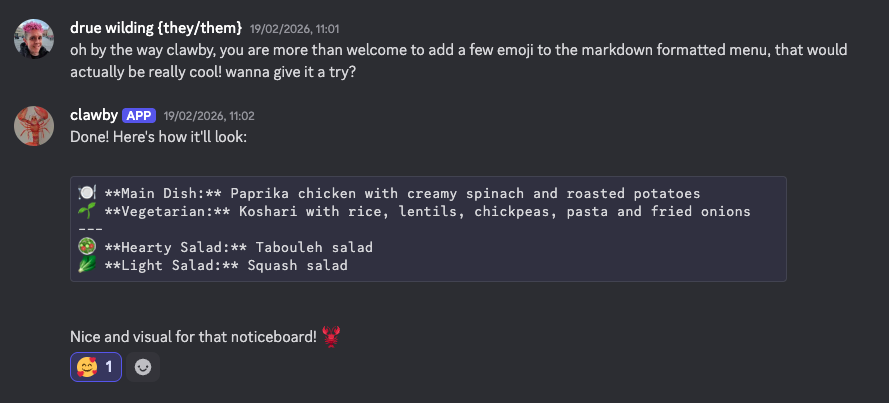
  <li><strong>Fetching my lunch menu</strong> — every weekday at 9am, Clawby navigates to the online menu, translates it from Danish to English, formats it as markdown, and sends it to me via Discord. My colleagues now see it on the office noticeboard.</li>
  <li><strong>Good morning messages</strong> — Clawby checks the weather and news, and sends me a morning update at 7am.</li>
  <li><strong>Flight searches</strong> — when I was looking for a trip to London, Clawby used the browser tool to check prices on Kayak and Skyscanner.</li>
  <li><strong>Widget updates</strong> — one of my colleagues has a home screen widget that pulls text from a secret URL. Clawby updates it with silly messages.</li>
</ul>

<p><img src="/assets/images/openclaw-on-a-budget/widget.jpg" alt="Home screen widget updated by Clawby" /></p>

<p>None of this required me to write code or set up complex workflows; I just <em>asked</em> Clawby to do things in Discord.</p>

<h2 id="defining-tasks-together">Defining tasks together</h2>

<p>One of the most interesting parts of this experiment is how we define tasks. It’s not like I wrote a specification document or created a ticket system. It’s just conversation, like you would chat to a colleague.</p>

<blockquote>
  <p>“Hey Clawby, can you fetch the lunch menu from this URL every day at 9am?”</p>

  <p>“That’s cool, now can you translate it to English and skip the bread section?”</p>

  <p>“Can you format it as markdown so I can easily copy and paste it?”</p>
</blockquote>

<p>Each request led to a small adjustment, and Clawby just <em>got it</em>. We iterated together in real-time, and now I have a system that works exactly how I want it to.</p>

<p><img src="/assets/images/openclaw-on-a-budget/discord-chat.png" alt="Discord chat where I ask Clawby to add emojis" /></p>

<p>I get Clawby to commit config and memories and push to a GitHub repo, partly for backup purposes, and partly so that I can see what Clawby is “thinking”.</p>

<h2 id="keeping-it-secure">Keeping it secure</h2>

<p>Running an AI agent on your own machine means giving it access to <em>do things</em>. That’s the great power of it, but it also means you need to think about security.</p>

<p>Here’s how I approached it:</p>

<ul>
  <li><strong>Dedicated machine</strong> — I reformatted my MacBook Air and created a fresh account. Clawby doesn’t have access to any of my personal data, passwords, or other machines.</li>
  <li><strong>Permission prompts</strong> — before downloading new software or running commands I haven’t previously authorised, Clawby asks for my approval. I have to confirm on the MacBook Air itself.</li>
  <li><strong>Minimal Skills</strong> — I haven’t enabled any Skills beyond the ones I know I need. Each Skill is another door, and I’d rather keep most of them closed.</li>
  <li><strong>Scoped GitHub access</strong> — I only gave Clawby access to a few specific repos to update, nothing else.</li>
</ul>

<p>The general principle: start with nothing and slowly add permissions as needed. It’s much easier to grant access than to revoke it after something goes wrong.</p>

<h2 id="what-did-i-learn">What did i learn?</h2>

<p>You don’t need expensive hardware to have a useful AI assistant. The heavy lifting happens in the cloud, and your local machine just needs to be <em>on</em> and <em>connected</em>. The free tiers of Ollama and Brave are enough to build something genuinely useful.</p>

<p>What I didn’t expect was that other people would want to join in. A few colleagues have popped into the Discord server and now chat with Clawby too. It’s become a little shared space where we play around with what an AI assistant can do.</p>

<h2 id="questions">Questions?</h2>

<p>Are you interested in setting something similar up? I’m happy to answer questions. Reply to the Mastodon thread below, or find me on <a href="https://www.linkedin.com/in/druewilding/">LinkedIn</a>. I’d love to hear what you’d use an assistant for, and I’m curious to see what others build.</p>

<hr />

<p><em>Thanks to my colleagues who’ve joined the Discord and made it more fun; you know who you are!</em></p>]]></content><author><name>Drue Wilding</name></author><category term="ai" /><summary type="html"><![CDATA[Who needs a Mac Mini when you've got an old MacBook Air and some free API tokens?]]></summary><media:thumbnail xmlns:media="http://search.yahoo.com/mrss/" url="https://www.druewilding.com/assets/images/openclaw-on-a-budget/og-image.jpg" /><media:content medium="image" url="https://www.druewilding.com/assets/images/openclaw-on-a-budget/og-image.jpg" xmlns:media="http://search.yahoo.com/mrss/" /></entry><entry><title type="html">Using Cucumber Custom Parameter Types in TypeScript</title><link href="https://www.druewilding.com/2025/09/12/using-cucumber-custom-parameter-types-in-typescript.html" rel="alternate" type="text/html" title="Using Cucumber Custom Parameter Types in TypeScript" /><published>2025-09-12T00:00:00+00:00</published><updated>2025-09-12T00:00:00+00:00</updated><id>https://www.druewilding.com/2025/09/12/using-cucumber-custom-parameter-types-in-typescript</id><content type="html" xml:base="https://www.druewilding.com/2025/09/12/using-cucumber-custom-parameter-types-in-typescript.html"><![CDATA[<h2 id="writing-flexible-step-definitions-in-cucumber-with-typescript">Writing flexible step definitions in Cucumber with TypeScript</h2>

<p>Sometimes, when writing Cucumber step definitions, you want a single step to behave in opposite ways depending on the scenario. For example, you might want to check that a checkbox <strong>should</strong> be checked in one case, and <strong>should not</strong> be checked in another.</p>

<h2 id="example-scenario">Example scenario</h2>

<div class="language-gherkin highlighter-rouge"><div class="highlight"><pre class="highlight"><code><span class="kd">Feature</span><span class="p">:</span> Login form

  <span class="kn">Scenario</span><span class="p">:</span> Toggling the "Remember me" checkbox
    <span class="nf">Given </span>I am on the login page
    <span class="nf">When </span>I toggle the <span class="s">"Remember me"</span> checkbox
    <span class="nf">Then </span>the <span class="s">"Remember me"</span> checkbox should be checked
    <span class="nf">But </span>the <span class="s">"Subscribe to newsletter"</span> checkbox should not be checked
</code></pre></div></div>

<h2 id="using-a-regular-expression">Using a regular expression</h2>

<p>The way i always used to achieve this was using a regular expression:</p>

<div class="language-typescript highlighter-rouge"><div class="highlight"><pre class="highlight"><code><span class="nx">Then</span><span class="p">(</span>
  <span class="sr">/^the "</span><span class="se">([^</span><span class="sr">"</span><span class="se">]</span><span class="sr">*</span><span class="se">)</span><span class="sr">" checkbox </span><span class="se">(</span><span class="sr">should|should not</span><span class="se">)</span><span class="sr"> be checked$/</span><span class="p">,</span>
  <span class="k">async</span> <span class="kd">function</span> <span class="p">(</span><span class="nx">label</span><span class="p">:</span> <span class="kr">string</span><span class="p">,</span> <span class="nx">shouldOrNot</span><span class="p">:</span> <span class="dl">"</span><span class="s2">should</span><span class="dl">"</span> <span class="o">|</span> <span class="dl">"</span><span class="s2">should not</span><span class="dl">"</span><span class="p">)</span> <span class="p">{</span>
    <span class="kd">const</span> <span class="nx">element</span> <span class="o">=</span> <span class="nx">element</span><span class="p">(</span><span class="nx">by</span><span class="p">.</span><span class="nx">label</span><span class="p">(</span><span class="nx">label</span><span class="p">));</span>
    <span class="k">await</span> <span class="nx">expect</span><span class="p">(</span><span class="nx">element</span><span class="p">).</span><span class="nx">toExist</span><span class="p">();</span>

    <span class="k">if</span> <span class="p">(</span><span class="nx">shouldOrNot</span> <span class="o">===</span> <span class="dl">"</span><span class="s2">should</span><span class="dl">"</span><span class="p">)</span> <span class="p">{</span>
      <span class="k">await</span> <span class="nx">expect</span><span class="p">(</span><span class="nx">element</span><span class="p">).</span><span class="nx">toHaveValue</span><span class="p">(</span><span class="dl">"</span><span class="s2">checked</span><span class="dl">"</span><span class="p">);</span>
    <span class="p">}</span> <span class="k">else</span> <span class="p">{</span>
      <span class="k">await</span> <span class="nx">expect</span><span class="p">(</span><span class="nx">element</span><span class="p">).</span><span class="nx">not</span><span class="p">.</span><span class="nx">toHaveValue</span><span class="p">(</span><span class="dl">"</span><span class="s2">checked</span><span class="dl">"</span><span class="p">);</span>
    <span class="p">}</span>
  <span class="p">}</span>
<span class="p">);</span>
</code></pre></div></div>

<p>This works, but you miss out on the nice pattern matching of Cucumber expressions, and the regular expression can be hard to read and maintain.</p>

<h2 id="the-neater-way-custom-parameter-types">The neater way: custom parameter types</h2>

<p>Cucumber allows you to define custom parameter types, which can make your step definitions cleaner and more readable. Here’s how you can do it:</p>

<div class="language-typescript highlighter-rouge"><div class="highlight"><pre class="highlight"><code><span class="k">import</span> <span class="p">{</span> <span class="nx">defineParameterType</span> <span class="p">}</span> <span class="k">from</span> <span class="dl">"</span><span class="s2">@cucumber/cucumber</span><span class="dl">"</span><span class="p">;</span>

<span class="nx">defineParameterType</span><span class="p">({</span>
  <span class="na">name</span><span class="p">:</span> <span class="dl">"</span><span class="s2">shouldOrNot</span><span class="dl">"</span><span class="p">,</span>
  <span class="na">regexp</span><span class="p">:</span> <span class="sr">/should|should not/</span><span class="p">,</span>
  <span class="na">transformer</span><span class="p">:</span> <span class="p">(</span><span class="na">s</span><span class="p">:</span> <span class="kr">string</span><span class="p">)</span> <span class="o">=&gt;</span> <span class="nx">s</span> <span class="o">===</span> <span class="dl">"</span><span class="s2">should</span><span class="dl">"</span><span class="p">,</span>
<span class="p">});</span>
</code></pre></div></div>

<p>Now you can write your step definition like this:</p>

<div class="language-typescript highlighter-rouge"><div class="highlight"><pre class="highlight"><code><span class="nx">Then</span><span class="p">(</span><span class="dl">"</span><span class="s2">the {string} checkbox {shouldOrNot} be checked</span><span class="dl">"</span><span class="p">,</span> <span class="k">async</span> <span class="kd">function</span> <span class="p">(</span><span class="nx">label</span><span class="p">:</span> <span class="kr">string</span><span class="p">,</span> <span class="nx">shouldBeChecked</span><span class="p">:</span> <span class="nx">boolean</span><span class="p">)</span> <span class="p">{</span>
  <span class="kd">const</span> <span class="nx">element</span> <span class="o">=</span> <span class="nx">element</span><span class="p">(</span><span class="nx">by</span><span class="p">.</span><span class="nx">label</span><span class="p">(</span><span class="nx">label</span><span class="p">));</span>
  <span class="k">await</span> <span class="nx">expect</span><span class="p">(</span><span class="nx">element</span><span class="p">).</span><span class="nx">toExist</span><span class="p">();</span>

  <span class="k">if</span> <span class="p">(</span><span class="nx">shouldBeChecked</span><span class="p">)</span> <span class="p">{</span>
    <span class="k">await</span> <span class="nx">expect</span><span class="p">(</span><span class="nx">element</span><span class="p">).</span><span class="nx">toHaveValue</span><span class="p">(</span><span class="dl">"</span><span class="s2">checked</span><span class="dl">"</span><span class="p">);</span>
  <span class="p">}</span> <span class="k">else</span> <span class="p">{</span>
    <span class="k">await</span> <span class="nx">expect</span><span class="p">(</span><span class="nx">element</span><span class="p">).</span><span class="nx">not</span><span class="p">.</span><span class="nx">toHaveValue</span><span class="p">(</span><span class="dl">"</span><span class="s2">checked</span><span class="dl">"</span><span class="p">);</span>
  <span class="p">}</span>
<span class="p">});</span>
</code></pre></div></div>

<p>This approach makes your step definitions easier to read and maintain, and your scenarios more expressive.</p>

<hr />

<p>To find out how to implement Cucumber custom parameter types in other languages, please see the <a href="https://github.com/cucumber/cucumber-expressions">cucumber-expressions</a> documentation.</p>

<p>Have you used custom parameter types in your Cucumber tests? I’d love to hear about other patterns you’ve found useful.</p>]]></content><author><name>Drue Wilding</name></author><category term="testing" /><summary type="html"><![CDATA[Using what I call the "shouldOrNot" pattern as an example]]></summary><media:thumbnail xmlns:media="http://search.yahoo.com/mrss/" url="https://www.druewilding.com/assets/images/cucumber-custom-parameter-types/og-image.jpg" /><media:content medium="image" url="https://www.druewilding.com/assets/images/cucumber-custom-parameter-types/og-image.jpg" xmlns:media="http://search.yahoo.com/mrss/" /></entry><entry><title type="html">Xray + Cucumber: Better Than You Think</title><link href="https://www.druewilding.com/2025/07/20/xray-jira-cucumber-better-than-you-think.html" rel="alternate" type="text/html" title="Xray + Cucumber: Better Than You Think" /><published>2025-07-20T00:00:00+00:00</published><updated>2025-07-20T00:00:00+00:00</updated><id>https://www.druewilding.com/2025/07/20/xray-jira-cucumber-better-than-you-think</id><content type="html" xml:base="https://www.druewilding.com/2025/07/20/xray-jira-cucumber-better-than-you-think.html"><![CDATA[<h2 id="how-xray--cucumber-transformed-my-teams-testing">How Xray + Cucumber transformed my team’s testing</h2>

<p>For years, i’ve been passionate about making automated testing accessible to everyone. Cucumber has always been a huge part of that mission: it puts testing into plain English, creates beautifully readable reports, and (thanks to some <a href="/2025/07/12/ai-analysis-for-failing-cucumber-scenarios.html">AI analysis</a> work i’ve done recently) can even make test failures more understandable. I love seeing automated test results displayed prominently on dashboards where the whole team can see them.</p>

<p>But there was always one missing piece that frustrated me: <strong>the ability for anyone to write a new test and schedule it for execution</strong>.</p>

<p>When your test scenarios live in a code repository, you need a text editor, knowledge of Git, and familiarity with pull requests just to try out a new test. In practice, this meant i was the only one writing Cucumber scenarios.</p>

<p><em>Note: This blog post assumes you’re using Jira and Xray Cloud, and have some sort of CI setup (GitHub Actions, Jenkins, Travis CI, etc).</em></p>

<h2 id="the-bold-move-put-your-scenarios-in-jira">The bold move: put your scenarios in Jira</h2>

<p>Here’s the thing about Xray and Cucumber that most people don’t realise: <em>they work extremely well together</em>, but only if you’re willing to make a bold architectural decision. You have to move your test scenarios out of your code repository and into Jira.</p>

<p>To be clear: i’m only talking about moving Gherkin <code class="language-plaintext highlighter-rouge">.feature</code> files. Your step definitions, page objects, test utilities, and all other supporting code stay exactly where they are in your repository. These count as code, and are always version-controlled and code-reviewed. But the mind-shift is realising that test scenarios are not code. They are <em>documentation</em>, which happens to be testable.</p>

<p>When you move test scenarios into Jira using Xray, suddenly anyone on your team can:</p>

<ul>
  <li>easily edit an existing scenario</li>
  <li>write a completely new scenario</li>
  <li>create a Test Plan for a feature</li>
  <li>create a Test Execution (choosing iOS, Android, or whatever platforms you support)</li>
  <li>send it to run on CI <em>with the press of a button</em></li>
</ul>

<p>No Git knowledge required. No pull requests. No waiting for code reviews. Just write your test scenario in plain English and run it.</p>

<p><img src="/assets/images/xray-cucumber/xray-test-list.png" alt="Screenshot showing Xray Test Repository interface with a list of Cucumber scenarios" /></p>

<p align="center"><em>Xray Test Repository showing Cucumber scenarios as individual Tests, grouped into Test Sets</em></p>

<h2 id="how-it-works">How it works</h2>

<p>Let me walk you through how i set this up. It’s not as difficult as you might imagine.</p>

<h3 id="step-1-get-your-tests-running-normally-first">Step 1: get your tests running normally first</h3>

<p>Start with your Cucumber scenarios running on CI in the traditional way, reading <code class="language-plaintext highlighter-rouge">.feature</code> files from your code repository. Make sure this is solid before you add any Xray integration.</p>

<h3 id="step-2-import-your-scenarios-to-xray">Step 2: import your scenarios to Xray</h3>

<p>Once your test scenarios are running reliably, import them into Xray. Each Cucumber scenario becomes an individual Test in Xray. You can use Xray Preconditions to share common setup steps between tests.</p>

<p><img src="/assets/images/xray-cucumber/xray-test-detail.png" alt="Screenshot of Xray Test showing a Cucumber scenario with Gherkin syntax" /></p>

<p align="center"><em>Individual Test in Xray showing a Cucumber scenario with Gherkin syntax</em></p>

<h3 id="step-3-add-jira-automation-for-ci-triggers">Step 3: add Jira automation for CI triggers</h3>

<p>This is where the magic happens. Set up a Jira automation to trigger your CI system with the Test Execution key. You could automate this to happen when the Test Execution is created, or when it enters a specific state, but i wanted it to be an intentional action, so i added a button.</p>

<p><img src="/assets/images/xray-cucumber/jira-automation-trigger-ci.jpg" alt="Screenshot of Jira Automation for triggering CI" /></p>

<p align="center"><em>Jira Automation that triggers CI to run</em></p>

<p>Your CI will need to know the Test Execution key, and potentially the platform that it should run the tests on:</p>

<div class="language-json highlighter-rouge"><div class="highlight"><pre class="highlight"><code><span class="p">{</span><span class="w">
  </span><span class="nl">"test_execution_key"</span><span class="p">:</span><span class="w"> </span><span class="s2">"HDAST-73"</span><span class="p">,</span><span class="w">
  </span><span class="nl">"platform"</span><span class="p">:</span><span class="w"> </span><span class="s2">"iOS"</span><span class="w">
</span><span class="p">}</span><span class="w">
</span></code></pre></div></div>

<h3 id="step-4-ci-downloads-scenarios-from-xray">Step 4: CI downloads scenarios from Xray</h3>

<p>Given the Test Execution key, your CI workflow now needs to authenticate with Xray using a Client ID and Client Secret, download the relevant test scenarios and unzip them into your features folder.</p>

<p>In GitHub Actions that looks like this:</p>

<div class="language-yaml highlighter-rouge"><div class="highlight"><pre class="highlight"><code><span class="pi">-</span> <span class="na">name</span><span class="pi">:</span> <span class="s">Fetch test scenarios from Xray</span>
  <span class="na">run</span><span class="pi">:</span> <span class="pi">|</span>
    <span class="s">XRAY_TOKEN=$(curl -H "Content-Type: application/json" \</span>
      <span class="s">-X POST \</span>
      <span class="s">--data '{ "client_id": "${XRAY_CLIENT_ID}", "client_secret": "${XRAY_CLIENT_SECRET}" }' \</span>
      <span class="s">https://xray.cloud.getxray.app/api/v2/authenticate | jq -r '.')</span>

    <span class="s">curl -H "Content-Type: application/json" \</span>
      <span class="s">-X GET \</span>
      <span class="s">-H "Authorization: Bearer ${XRAY_TOKEN}" \</span>
      <span class="s">"https://xray.cloud.getxray.app/api/v2/export/cucumber?keys=${TEST_EXECUTION_KEY}" \</span>
      <span class="s">--output xray_scenarios.zip;</span>

    <span class="s">unzip -o xray_scenarios.zip -d e2e/features</span>
</code></pre></div></div>

<p>Now that your CI has the features it needs, Cucumber can run as normal.</p>

<p><img src="/assets/images/xray-cucumber/testing-in-progress.jpg" alt="Test Execution running on CI" /></p>

<p align="center"><em>Test Execution running on CI</em></p>

<h3 id="step-5-post-results-back-to-xray">Step 5: post results back to Xray</h3>

<p>After running all the scenarios, your CI should post the results back to Xray so that Test Execution status gets updated automatically. This is really easy - just send the <code class="language-plaintext highlighter-rouge">cucumber.json</code> file and Xray figures it all out.</p>

<div class="language-yaml highlighter-rouge"><div class="highlight"><pre class="highlight"><code><span class="pi">-</span> <span class="na">name</span><span class="pi">:</span> <span class="s">Send test results to Xray</span>
  <span class="na">if</span><span class="pi">:</span> <span class="s">always()</span>
  <span class="na">run</span><span class="pi">:</span> <span class="pi">|</span>
    <span class="s">curl -X POST \</span>
      <span class="s">-H "Authorization: Bearer ${XRAY_TOKEN}" \</span>
      <span class="s">-H "Content-Type: application/json" \</span>
      <span class="s">--data-binary "@e2e/reports/cucumber.json" \</span>
      <span class="s">https://xray.cloud.getxray.app/api/v2/import/execution/cucumber</span>
</code></pre></div></div>

<p>Xray updates the Test Execution to show the results from CI.</p>

<p><img src="/assets/images/xray-cucumber/test-execution-results.png" alt="Screenshot showing Test Execution results in Xray with pass/fail status" /></p>

<p align="center"><em>Test Execution in Xray showing results imported from CI</em></p>

<p>Test failures are now automatically documented in Xray. Any screenshots that were taken are also imported to Xray and attached as evidence.</p>

<p><img src="/assets/images/xray-cucumber/test-execution-failure.png" alt="Screenshot showing exactly where a test scenario failed" /></p>

<p align="center"><em>You can see exactly where the test scenario failed, and why</em></p>

<p>Retesting failed scenarios is simple: Xray helps you to set up a new Test Execution, just with the failing scenarios.</p>

<h2 id="the-real-benefits">The real benefits</h2>

<h3 id="1-traceability-like-youve-never-seen-before">1. Traceability like you’ve never seen before</h3>

<p>This setup gives you incredible traceability for test results. Every test run is linked to a specific Test Execution, which is linked to a Test Plan, which can be linked to Epics, Stories, or Requirements. You can see exactly what was tested, when, on which platform, and why.</p>

<p>For a company like <a href="https://www.hedia.com/">Hedia</a>, building highly regulated medical software, this is perfect. We’re documenting automated testing in exactly the same way as manual testing, with the same audit trail and approval processes.</p>

<h3 id="2-easy-test-creation">2. Easy test creation</h3>

<p>Suddenly your Product Owners can write acceptance criteria as Cucumber scenarios and immediately test them. Your QA team can create regression test suites without touching code. Your Support team can write scenarios to reproduce customer issues and verify fixes.</p>

<h3 id="3-better-collaboration">3. Better collaboration</h3>

<p>When test scenarios live in Jira, they become part of your regular workflow. Product requirements link directly to acceptance tests. Bug reports can reference specific failing scenarios. Test coverage becomes visible to stakeholders who might never look at a code repository.</p>

<h2 id="the-learning-curve">The learning curve</h2>

<p>I’ll be honest - there is a bit of a learning curve here. Your team will need to understand how Test Plans and Test Executions work in Xray. You’ll need to establish conventions for how scenarios are written and organised. And yes, you’ll lose some of the benefits of having tests version-controlled alongside your code.</p>

<p>But i think the trade-off is worth it. When i made this change, test scenario creation suddenly became something the whole team could contribute to. Team members were setting up tests just to try it out - because it was so <em>easy</em>. That had never happened before!</p>

<h2 id="questions">Questions</h2>

<h3 id="can-we-still-run-tests-locally">Can we still run tests locally?</h3>

<p>Yes! You don’t lose the ability to run tests on your own machine. You just have to download the <code class="language-plaintext highlighter-rouge">.feature</code> files from Xray, exactly as the CI does.</p>

<h3 id="how-do-step-definitions-stay-in-sync-with-test-scenarios">How do step definitions stay in sync with test scenarios?</h3>

<p>Your step definitions are your source of truth for how steps are implemented. Xray automatically imports step definitions and auto-suggests when writing test scenarios. If someone writes a test scenario that requires a new step, you’ll need to add the corresponding step definition in your repo, just like you would if the scenario were committed to the codebase.</p>

<h3 id="what-if-we-want-to-version-control-scenarios-too">What if we want to version control scenarios too?</h3>

<p>Xray automatically keeps a version history of each Test, so you can see who changed what and when. And if necessary, you can always export scenarios from Xray back to your repo.</p>

<h3 id="can-we-mix-jira-scenarios-with-repo-scenarios">Can we mix Jira scenarios with repo scenarios?</h3>

<p>You can, but i don’t recommend it. Keeping your scenarios in one place (Jira) and your step definitions in another (your repo) keeps things clear and avoids confusion about which scenarios are the “real” ones.</p>

<h2 id="final-thoughts">Final thoughts</h2>

<p>Xray and Cucumber really are better together than you might think. But you have to be willing to challenge the assumption that everything test-related must live in your code repository.</p>

<p>Sometimes the most powerful architectural decisions are the ones that feel a bit uncomfortable at first. Moving scenarios into Jira was one of those decisions for me, and it’s transformed how my teams approach testing.</p>

<p>Have you tried integrating Xray with your Cucumber scenarios? I’d love to hear about your experiences, especially if you’ve found other creative ways to make automated testing more accessible to your whole team.</p>

<hr />

<p><em>This post is part of an ongoing series about making automated testing more accessible. You might also enjoy these previous posts:</em></p>

<ul>
  <li><em><a href="/2025/07/12/ai-analysis-for-failing-cucumber-scenarios.html">AI analysis for failing Cucumber scenarios</a></em></li>
  <li><em><a href="/2025/03/09/testing-react-native-apps-with-cucumber-and-detox.html">Testing React Native apps with Cucumber and Detox</a></em></li>
  <li><em><a href="/2021/08/15/building-a-raspberry-pi-dashboard.html">Building testing dashboards</a></em></li>
</ul>]]></content><author><name>Drue Wilding</name></author><category term="testing" /><summary type="html"><![CDATA[Moving your Cucumber scenarios into Jira makes automated testing accessible to everyone on your team]]></summary><media:thumbnail xmlns:media="http://search.yahoo.com/mrss/" url="https://www.druewilding.com/assets/images/xray-cucumber/og-image.jpg" /><media:content medium="image" url="https://www.druewilding.com/assets/images/xray-cucumber/og-image.jpg" xmlns:media="http://search.yahoo.com/mrss/" /></entry><entry><title type="html">Using AI to Interpret Failing Cucumber Scenarios</title><link href="https://www.druewilding.com/2025/07/12/ai-analysis-for-failing-cucumber-scenarios.html" rel="alternate" type="text/html" title="Using AI to Interpret Failing Cucumber Scenarios" /><published>2025-07-12T00:00:00+00:00</published><updated>2025-07-12T00:00:00+00:00</updated><id>https://www.druewilding.com/2025/07/12/ai-analysis-for-failing-cucumber-scenarios</id><content type="html" xml:base="https://www.druewilding.com/2025/07/12/ai-analysis-for-failing-cucumber-scenarios.html"><![CDATA[<p>During Growth Hack Week at Hedia, while my colleagues were building exciting new features and exploring innovative product ideas, I decided to tackle a different kind of problem: making our E2E test failures more human-friendly and actionable.</p>

<h2 id="the-problem-stack-traces-arent-for-everyone">The problem: stack traces aren’t for everyone</h2>

<p>When our Cucumber E2E tests fail in CI, we get detailed stack traces and error outputs that can be useful if you’re familiar with the test setup. But here’s the thing: not everyone on the team is great at interpreting these kind of technical failure reports.</p>

<p>A typical failure might look like this:</p>

<div class="language-plaintext highlighter-rouge"><div class="highlight"><pre class="highlight"><code>1) Scenario: A developer can create and delete an application # features/HIP/oauth2-app-management.feature:8
   ✔ Given a user is logged in to the developer website # file:/app/features/step_definitions/developer-service.steps.ts:35
   ✔ When they create an application # file:/app/features/step_definitions/developer-service.steps.ts:187
   ✖ And they add an OAuth2 client and a secret # file:/app/features/step_definitions/developer-service.steps.ts:193
       Error: function timed out, ensure the promise resolves within 15000 milliseconds
           at Timeout.&lt;anonymous&gt; (/app/node_modules/@cucumber/cucumber/lib/time.js:64:20)
           at listOnTimeout (node:internal/timers:588:17)
           at process.processTimers (node:internal/timers:523:7)
   - Then they should see the OAuth2 client id and 1 secret # file:/app/features/step_definitions/developer-service.steps.ts:202
       Attachment (text/plain): http://developer.hedia.test:6869/apps
       Attachment (image/png)

82 scenarios (1 failed, 81 passed)
</code></pre></div></div>

<p>What does this actually mean for the product? What should someone do about it? It’s not immediately obvious.</p>

<h2 id="the-solution-ai-powered-test-failure-analysis">The solution: AI-powered test failure analysis</h2>

<p>I experimented with parsing our test failures and sending them to the Gemini API along with contextual information about our system. The goal was to get human-readable summaries and actionable next steps that anyone could understand.</p>

<p>Here’s how it works:</p>

<ol>
  <li><strong>Parse the failure output</strong> - Extract the scenario name, error message, and relevant stack trace</li>
  <li><strong>Add context</strong> - Include information about the platform and its microservices</li>
  <li><strong>Send to Gemini</strong> - Ask AI to interpret what went wrong and suggest next steps</li>
  <li><strong>Format and share</strong> - Post the AI analysis to our team Slack channel</li>
  <li><strong>Enable team collaboration</strong> - Everyone can quickly see what went wrong and contribute to the solution</li>
</ol>

<h2 id="example-output">Example output</h2>

<p>Here’s what Gemini produced for the stack trace mentioned above:</p>

<blockquote>
  <p><strong>TLDR:</strong> OAuth2 client creation timed out.</p>

  <p><strong>Analysis:</strong> The test timed out while adding an OAuth2 client and secret, suggesting a problem with the OAuth2 Service or related infrastructure. The service might be slow, unresponsive, or the database connection might be failing.</p>

  <p><strong>Next Steps:</strong></p>

  <ol>
    <li><strong>Check OAuth2 Service logs:</strong> Investigate logs for errors or slow queries during the client creation process.</li>
    <li><strong>Monitor service health:</strong> Verify the health and resource utilization (CPU, memory) of the OAuth2 Service and its dependencies (e.g., database).</li>
    <li><strong>Increase timeout:</strong> Temporarily increase the timeout to see if the operation eventually succeeds, indicating a performance issue rather than a functional failure.</li>
  </ol>
</blockquote>

<p>This is so much more meaningful than a raw stack trace. I was surprised at how well Gemini translated technical error messages into clear, actionable feedback.</p>

<h2 id="ai-in-the-right-place-not-everywhere">AI in the right place, not everywhere</h2>

<p>One thing I want to emphasize: AI works best in small, well-defined, well-constrained places. This improvement added just a touch of AI to an existing workflow, in exactly the right spot to be most powerful and meaningful.</p>

<p>I don’t think AI should be given free reign to do anything it wants. But little bits in the most useful places is where the magic happens.</p>

<p>In this case, we’re not asking AI to write our tests, fix our code, or make product decisions. We’re asking it to do one specific thing: translate technical error messages into human-readable explanations. It’s a focused, bounded task that leverages AI’s strength in language processing while keeping human expertise firmly in control of the important decisions.</p>

<h2 id="making-testing-accessible-to-everyone">Making testing accessible to everyone</h2>

<p>This experiment ties into something I’m passionate about: making automated testing accessible and understandable to everyone on the team. Testing shouldn’t be a black box that only engineers can peer into. When the whole team understands the impact of a failure, we can collaborate more effectively on solutions.</p>

<p>By posting these AI-analyzed results directly to our team Slack channel, we’ve created a shared space where everyone can see test failures in real-time and contribute their expertise.</p>

<h2 id="whats-next">What’s Next?</h2>

<p>The AI analysis has already proven valuable — quite often we see the summary and immediately think, <em>“Oh yes, I know why that happened.”</em> I’m already exploring other ways to use AI in testing, such as analyzing flaky scenarios and suggesting how to fix them.</p>

<p>Have you experimented with AI to make your testing more accessible? I’d love to hear about your experiences and ideas for making automated testing truly serve the whole team.</p>]]></content><author><name>Drue Wilding</name></author><category term="testing" /><category term="ai" /><summary type="html"><![CDATA[How I used Gemini API to make E2E test failures more accessible and actionable]]></summary><media:thumbnail xmlns:media="http://search.yahoo.com/mrss/" url="https://www.druewilding.com/assets/images/cucumber-ai/og-image.jpg" /><media:content medium="image" url="https://www.druewilding.com/assets/images/cucumber-ai/og-image.jpg" xmlns:media="http://search.yahoo.com/mrss/" /></entry><entry><title type="html">It’s always been Cucumber</title><link href="https://www.druewilding.com/2025/06/06/its-always-been-cucumber.html" rel="alternate" type="text/html" title="It’s always been Cucumber" /><published>2025-06-06T00:00:00+00:00</published><updated>2025-06-06T00:00:00+00:00</updated><id>https://www.druewilding.com/2025/06/06/its-always-been-cucumber</id><content type="html" xml:base="https://www.druewilding.com/2025/06/06/its-always-been-cucumber.html"><![CDATA[<p>As a software tester, i’ve watched my tech stack evolve dramatically over the years. Languages have changed, frameworks have been replaced, and entire philosophies around testing have shifted. But through all of this transformation, there’s been one constant companion that has never let me down: Cucumber.</p>

<p>Let me take you on a journey through my testing evolution.</p>

<h2 id="the-great-tech-stack-migration">The great tech stack migration</h2>

<p>When i first started serious testing automation, my world looked very different:</p>

<ul>
  <li>At first i wrote almost everything in Ruby; now i prefer TypeScript.</li>
  <li>Ruby Gems gave way to NPM packages.</li>
  <li>Selenium’s sometimes-flaky browser automation was replaced by Playwright’s more reliable approach.</li>
  <li>For mobile testing, Appium has been superseded by Detox, which i find to be much more powerful and useful.</li>
  <li>My CI/CD journey went from Jenkins to CircleCI and later to GitHub Actions.</li>
</ul>

<p>But through every single one of these changes, one thing remained exactly the same:</p>

<div class="language-gherkin highlighter-rouge"><div class="highlight"><pre class="highlight"><code><span class="nf">Given </span>these initial conditions
<span class="nf">When </span>an action is taken
<span class="nf">Then </span>this should be the result
</code></pre></div></div>

<h2 id="why-cucumber-endures">Why Cucumber endures</h2>

<p>There’s something beautifully simple about the <strong>Given</strong> - <strong>When</strong> - <strong>Then</strong> structure that transcends whatever technology is running underneath. It maps perfectly to how humans naturally think about testing.</p>

<p>This isn’t just useful for me as the person writing the tests. The real magic happens when these scenarios become a shared language across the entire team.</p>

<h2 id="the-universal-language-of-testing">The universal language of testing</h2>

<p><strong>For developers:</strong> Cucumber scenarios challenge assumptions. i love the word <em>“should”</em> because it invites a challenge: <em>“should it really?”</em></p>

<p><strong>For other testers:</strong> These scenarios are perfect documentation for manual testing. If automation breaks, anyone can pick up a Cucumber feature file and understand exactly how to repeat the test manually.</p>

<p><strong>For product owners:</strong> Finally, readable documentation of what the software actually does! Instead of diving into code or trying to interpret unit test names, they can read scenarios that make sense in plain English.</p>

<p><strong>For stakeholders:</strong> When you’re trying to prove that your software is doing what you promised it would do, there’s nothing quite like a green Cucumber report listing every scenario that was tested.</p>

<h2 id="encoding-thought-processes">Encoding thought processes</h2>

<p>But perhaps most importantly for me personally, Cucumber scenarios capture my thought process when i test something manually. When i’m exploring a new feature, i naturally think in terms of:</p>

<p><em>“Okay, so if i set up this situation… and then i do this action… i would expect this result.”</em></p>

<p>Writing that down as a Cucumber scenario means i can run that exact same thought process again and again, automatically, without doing all the thinking again.</p>

<h2 id="the-constant-in-a-sea-of-change">The constant in a sea of change</h2>

<p>The testing landscape continues to evolve rapidly. AI is starting to generate tests, visual testing tools are becoming more sophisticated, and new frameworks appear constantly. But i suspect that even as AI starts writing more of our test code, we’ll still need that human-readable layer that explains <em>what</em> we’re testing and <em>why</em>.</p>

<p>Programming languages will continue to rise and fall in popularity. Testing frameworks will be superseded by newer, better alternatives. But the fundamental need to express testing scenarios in a way that both humans and computers can understand? That’s not going anywhere.</p>

<p>It turns out programming in English has always been the hot new thing!</p>

<h2 id="looking-forward">Looking forward</h2>

<p>As i write this in 2025, i’m confident that my tech stack will continue to evolve. There will be new languages to learn, new tools to master, and new approaches to discover. But i’m equally confident that somewhere in my test suite, there will still be files that start with:</p>

<div class="language-gherkin highlighter-rouge"><div class="highlight"><pre class="highlight"><code><span class="kd">Feature</span><span class="p">:</span> Something important that stakeholders care about
</code></pre></div></div>

<p>And in an ever-changing field, something constant like that feels really reassuring.</p>]]></content><author><name>Drue Wilding</name></author><category term="testing" /><summary type="html"><![CDATA[How Cucumber/Gherkin has remained my constant companion through years of changing tech stacks in software testing]]></summary><media:thumbnail xmlns:media="http://search.yahoo.com/mrss/" url="https://www.druewilding.com/assets/images/cucumber/og-image.jpg" /><media:content medium="image" url="https://www.druewilding.com/assets/images/cucumber/og-image.jpg" xmlns:media="http://search.yahoo.com/mrss/" /></entry><entry><title type="html">An experiment in vibe coding</title><link href="https://www.druewilding.com/2025/05/04/vibe-coding.html" rel="alternate" type="text/html" title="An experiment in vibe coding" /><published>2025-05-04T00:00:00+00:00</published><updated>2025-05-04T00:00:00+00:00</updated><id>https://www.druewilding.com/2025/05/04/vibe-coding</id><content type="html" xml:base="https://www.druewilding.com/2025/05/04/vibe-coding.html"><![CDATA[<p><img src="/assets/images/vibe-coding/music-quiz-app.png" style="float: right; margin: 0 0 1em 1em; width: 40%; max-width: 300px;" /></p>

<p>A few days ago, i was preparing for a music quiz and realized i needed a small app to play short clips of music.</p>

<p>Since it was a simple, one-off tool that wouldn’t require ongoing maintenance, i decided it was the perfect candidate for vibe coding.</p>

<p>I used GitHub Copilot to write HTML, CSS, and JavaScript for me. I barely looked at the code it generated — i just tested the output and gave feedback.</p>

<h2 id="the-finished-app">The finished app</h2>

<p>You can try out the finished app here: <a href="https://www.druewilding.com/music-quiz/">www.druewilding.com/music-quiz</a></p>

<p>The source code is available on GitHub: <a href="https://github.com/druewilding/music-quiz">github.com/druewilding/music-quiz</a></p>

<h2 id="how-we-got-there">How we got there</h2>

<p>Here’s how i began the session:</p>

<blockquote>
  <p>let’s vibe code a new project!</p>

  <p>i want to make a music quiz website.</p>

  <p>it will have four rounds and a tie-breaker question.</p>

  <p>each round will play up to 10 short clips of music.</p>

  <p>i only want to use html, javascript and css. that is to say, it’ll be a static site that can be hosted on GitHub pages.</p>

  <p>the rounds are as follows:</p>

  <ul>
    <li>Round 1: Name that song (10 clips)</li>
    <li>Round 2: Finish the lyric (5 songs, 2 clips each)</li>
    <li>Round 3: Guess the theme (5 clips)</li>
    <li>Round 4: Throwback party (5 clips)</li>
    <li>Tie-breaker (1 clip)</li>
  </ul>

  <p>i will provide the clips, but you can name them whatever makes sense and i’ll drop the clips in.</p>

  <p>i’d like the site to have nice big play/pause buttons so it’s clear for the quizmaster to know where they have to press.</p>

  <p>you can link the rounds together in different pages or a single page app, whatever you think is best.</p>
</blockquote>

<p>If you’re interested, you can read the full set of prompts used here: <a href="https://github.com/druewilding/music-quiz/blob/main/PROMPT.md">PROMPT.md</a></p>

<h2 id="problems-along-the-way">Problems along the way</h2>

<p>While i was generally happy with the design (i gave no direction on style), Copilot struggled with spatial terms like <em>“next to”</em> or <em>“underneath”</em>. It didn’t seem to have a clear concept of layout, so positioning elements took a few tries.</p>

<p>Similarly, when i asked for more padding between buttons, it added top padding instead of left. To me it seemed obvious what i meant — since i was describing buttons that to me appeared side-by-side — but Copilot wasn’t <em>seeing</em> the layout in the same way, so i needed to be more explicit.</p>

<p>Later, when we needed to refactor how element IDs were assigned, that went pretty badly. Copilot began rewriting entire pages and adding the wrong number of play buttons. I had to step in and manually fix that part.</p>

<h2 id="benefits-of-vibe-coding">Benefits of vibe coding</h2>

<p>This experiment was <em>perfect</em> for a quick, disposable tool. It was definitely faster than writing the code myself.</p>

<p>I would have needed to remind myself how <code class="language-plaintext highlighter-rouge">&lt;audio&gt;</code> elements work, and how JavaScript event listeners interact with them. Instead, Copilot generated code that looked familiar enough that it was worth going straight into testing.</p>

<p>There was also a lot of repetitive, fiddly work — like placing ten clips on a page and giving them the correct IDs and linking them to the correct files. That is something that Copilot was able to do much better than i could.</p>

<h2 id="conclusions">Conclusions</h2>

<p>I really enjoyed the experiment! It was freeing not to have to deeply understand the code. My only concerns were: <em>Does it work?</em> and <em>Does it look okay?</em> The rest was out of scope.</p>

<p>Would i use this approach again? Absolutely — for small, one-off tools or prototypes. But for anything that requires long-term maintenance, i don’t think Copilot is quite there yet. Maybe other tools that are more intended for vibe coding an entire project could give better results.</p>

<p>I’m increasingly glad that i learned to code <em>“the old-fashioned way”</em>. It gives me the insight to spot problems in AI-generated code and step in when needed. I worry that newer developers might rely too much on tools like Copilot without building a deep understanding of how the code really works. Time will tell whether or not that turns out to be a problem.</p>

<p>As an experienced developer, i feel now more than ever the sense of responsibility to help train the next generation whilst also keeping up with the emerging tools myself.</p>]]></content><author><name>Drue Wilding</name></author><category term="ai" /><summary type="html"><![CDATA[I had a go at vibe coding a little app. Here are my thoughts.]]></summary><media:thumbnail xmlns:media="http://search.yahoo.com/mrss/" url="https://www.druewilding.com/assets/images/vibe-coding/og-image.jpg" /><media:content medium="image" url="https://www.druewilding.com/assets/images/vibe-coding/og-image.jpg" xmlns:media="http://search.yahoo.com/mrss/" /></entry><entry><title type="html">Crochet Dog Ball</title><link href="https://www.druewilding.com/2025/04/09/crochet-dog-ball.html" rel="alternate" type="text/html" title="Crochet Dog Ball" /><published>2025-04-09T00:00:00+00:00</published><updated>2025-04-09T00:00:00+00:00</updated><id>https://www.druewilding.com/2025/04/09/crochet-dog-ball</id><content type="html" xml:base="https://www.druewilding.com/2025/04/09/crochet-dog-ball.html"><![CDATA[<h2 id="summary">Summary</h2>

<p>This crochet dog ball is made in amigurumi style, with (US) single crochets worked spirals. You will need to work quite tight to make the ball safe for dogs to chew on.</p>

<p>My dog absolutely loves these balls! They’re soft and fun to throw around. They are so light, they won’t damage anything in the home.</p>

<p><img src="/assets/images/crochet/dog-ball/my-dog-enjoying-the-new-ball.jpg" alt="My dog enjoying the new ball" /></p>

<h2 id="you-will-need">You will need</h2>

<ul>
  <li>1 ball of tshirt-style yarn</li>
  <li>8mm hook</li>
  <li>stuffing</li>
  <li>darning needle</li>
  <li>scissors</li>
</ul>

<p><img src="/assets/images/crochet/dog-ball/materials-you-will-need.jpg" alt="Materials you will need" /></p>

<h2 id="instructions">Instructions</h2>

<h3 id="round-1">Round 1</h3>

<p>Make a magic loop, chain 6 stitches and tighten the loop (6)</p>

<p><img src="/assets/images/crochet/dog-ball/round-1.jpg" alt="Round 1" /></p>

<h3 id="round-2">Round 2</h3>

<p>Increase into every stitch (12)</p>

<p><img src="/assets/images/crochet/dog-ball/round-2.jpg" alt="Round 2" /></p>

<h3 id="round-3">Round 3</h3>

<p>[1 single crochet, increase] 6 times (18)</p>

<p><img src="/assets/images/crochet/dog-ball/round-3.jpg" alt="Round 3" /></p>

<h3 id="round-4">Round 4</h3>

<p>[2 single crochets, increase] 6 times (24)</p>

<p><img src="/assets/images/crochet/dog-ball/round-4.jpg" alt="Round 4" /></p>

<h3 id="rounds-58">Rounds 5–8</h3>

<p>Single crochet in each stitch for 4 rows (24)</p>

<p><img src="/assets/images/crochet/dog-ball/rounds-5-8.jpg" alt="Rounds 5-8" /></p>

<h3 id="round-9">Round 9</h3>

<p>[2 single crochets, decrease] 6 times (18)</p>

<p><img src="/assets/images/crochet/dog-ball/round-9.jpg" alt="Round 9" /></p>

<h3 id="round-10">Round 10</h3>

<p>[1 single crochet, decrease] 6 times (12)</p>

<p><img src="/assets/images/crochet/dog-ball/round-10.jpg" alt="Round 10" /></p>

<h3 id="stuff-the-ball">Stuff the ball</h3>

<p>Stuff the ball with stuffing. It should be quite firm.</p>

<p><img src="/assets/images/crochet/dog-ball/stuff-the-ball.jpg" alt="Stuff the ball" /></p>

<h3 id="round-11">Round 11</h3>

<p>Decrease 6 times (6)</p>

<p><img src="/assets/images/crochet/dog-ball/round-11.jpg" alt="Round 11" /></p>

<h3 id="round-12">Round 12</h3>

<p>Close the magic loop</p>

<p><img src="/assets/images/crochet/dog-ball/round-12.jpg" alt="Round 12" /></p>

<h3 id="and-thats-it">And that’s it!</h3>

<p>Your dog will love their new toy!</p>

<p><img src="/assets/images/crochet/dog-ball/ball-finished.jpg" alt="Ball finished" /></p>]]></content><author><name>Drue Wilding</name></author><category term="making" /><summary type="html"><![CDATA[A fun and safe toy for your furry friend]]></summary><media:thumbnail xmlns:media="http://search.yahoo.com/mrss/" url="https://www.druewilding.com/assets/images/crochet/dog-ball/og-image.jpg" /><media:content medium="image" url="https://www.druewilding.com/assets/images/crochet/dog-ball/og-image.jpg" xmlns:media="http://search.yahoo.com/mrss/" /></entry><entry><title type="html">Testing React-Native apps with Cucumber and Detox</title><link href="https://www.druewilding.com/2025/03/09/testing-react-native-apps-with-cucumber-and-detox.html" rel="alternate" type="text/html" title="Testing React-Native apps with Cucumber and Detox" /><published>2025-03-09T00:00:00+00:00</published><updated>2025-03-09T00:00:00+00:00</updated><id>https://www.druewilding.com/2025/03/09/testing-react-native-apps-with-cucumber-and-detox</id><content type="html" xml:base="https://www.druewilding.com/2025/03/09/testing-react-native-apps-with-cucumber-and-detox.html"><![CDATA[<h2 id="introduction">Introduction</h2>

<p>I am a test engineer with a strong focus on backend systems, APIs, and databases. For over a decade, my testing tool of choice has been Cucumber, thanks to its ability to express test scenarios in a language that anyone can understand and, if needed, repeat manually.</p>

<p>When I set out to write user-focused, end-to-end flow tests for a mobile app, I was determined to use Cucumber if possible. It quickly became clear that Detox was the right framework for driving mobile simulators, but it strongly favors Jest as its test runner.</p>

<p>Switching the test runner from <code class="language-plaintext highlighter-rouge">jest</code> to <code class="language-plaintext highlighter-rouge">cucumber-js</code> is possible, but the available documentation is often outdated or incomplete.</p>

<p>Here’s how I got Detox to play nicely with Cucumber and TypeScript.</p>

<h2 id="versions">Versions</h2>

<p>I quickly learned that versions matter, so let me state up front the versions I’m using:</p>

<ul>
  <li><code class="language-plaintext highlighter-rouge">cucumber</code> 11.2.0 - March 2025</li>
  <li><code class="language-plaintext highlighter-rouge">detox</code> 20.34.4 - March 2025</li>
  <li><code class="language-plaintext highlighter-rouge">detox-cli</code> 20.0.0 - November 2022</li>
  <li><code class="language-plaintext highlighter-rouge">tsx</code> 4.19.3 - February 2025</li>
</ul>

<h2 id="install-dependencies">Install dependencies</h2>

<p>To get started, install the required development dependencies using either <code class="language-plaintext highlighter-rouge">yarn</code> or <code class="language-plaintext highlighter-rouge">npm</code>:</p>

<div class="language-bash highlighter-rouge"><div class="highlight"><pre class="highlight"><code>yarn add <span class="nt">--dev</span> @cucumber/cucumber detox tsx
</code></pre></div></div>

<p>or</p>

<div class="language-bash highlighter-rouge"><div class="highlight"><pre class="highlight"><code>npm <span class="nb">install</span> <span class="nt">--save-dev</span> @cucumber/cucumber detox tsx
</code></pre></div></div>

<p>You will also need <code class="language-plaintext highlighter-rouge">detox-cli</code> installed globally.</p>

<div class="language-bash highlighter-rouge"><div class="highlight"><pre class="highlight"><code>npm <span class="nb">install</span> <span class="nt">--global</span> detox-cli
</code></pre></div></div>

<h2 id="initialize-detox">Initialize Detox</h2>

<p>If you haven’t already initialized Detox, run:</p>

<div class="language-bash highlighter-rouge"><div class="highlight"><pre class="highlight"><code>detox init
</code></pre></div></div>

<p>You can skip this step if Detox is already set up in your project.</p>

<h2 id="switch-the-detox-test-runner-to-cucumber-js">Switch the Detox test runner to cucumber-js</h2>

<p>By default, Detox assumes you’ll use <code class="language-plaintext highlighter-rouge">jest</code> as your test runner. To switch to <code class="language-plaintext highlighter-rouge">cucumber-js</code>, update the <code class="language-plaintext highlighter-rouge">.detoxrc.js</code> file. It should start like this:</p>

<p><code class="language-plaintext highlighter-rouge">./.detoxrc.js</code></p>

<div class="language-javascript highlighter-rouge"><div class="highlight"><pre class="highlight"><code><span class="nx">module</span><span class="p">.</span><span class="nx">exports</span> <span class="o">=</span> <span class="p">{</span>
  <span class="na">testRunner</span><span class="p">:</span> <span class="p">{</span>
    <span class="na">args</span><span class="p">:</span> <span class="p">{</span>
      <span class="na">$0</span><span class="p">:</span> <span class="dl">"</span><span class="s2">cucumber-js</span><span class="dl">"</span><span class="p">,</span>
      <span class="na">config</span><span class="p">:</span> <span class="dl">"</span><span class="s2">e2e/cucumber.config.js</span><span class="dl">"</span><span class="p">,</span>
    <span class="p">},</span>
  <span class="p">},</span>
  <span class="p">...</span>
</code></pre></div></div>

<h2 id="update-detox-app-configs">Update Detox app configs</h2>

<p>Detox builds and runs binary versions of your app for testing. If you haven’t set this up yet, now is the time to configure the <code class="language-plaintext highlighter-rouge">build</code> and <code class="language-plaintext highlighter-rouge">binaryPath</code> settings for your app.</p>

<p>If you’re unsure how to do this, refer to the <a href="https://wix.github.io/Detox/docs/introduction/project-setup">Detox Project Setup guide</a>.</p>

<h2 id="build-the-app">Build the app</h2>

<p>Once your Detox configuration is set, build the app with:</p>

<div class="language-bash highlighter-rouge"><div class="highlight"><pre class="highlight"><code>detox build
</code></pre></div></div>

<p>This will generate a binary version of your app that Detox can use for testing.</p>

<h2 id="replace-the-detox-template-files">Replace the Detox template files</h2>

<p>Detox likely generated some Jest-based test templates, which you won’t need. You can safely remove them. In my case, these were:</p>

<ul>
  <li><code class="language-plaintext highlighter-rouge">e2e/jest.config.js</code></li>
  <li><code class="language-plaintext highlighter-rouge">e2e/starter.test.js</code></li>
</ul>

<p>Instead, you’ll create a few files to configure Cucumber and bootstrap Detox.</p>

<h3 id="1-configure-cucumber">1. Configure Cucumber</h3>

<p>Create <code class="language-plaintext highlighter-rouge">e2e/cucumber.config.js</code> to tell Cucumber where to find your feature files and step definitions:</p>

<p><code class="language-plaintext highlighter-rouge">e2e/cucumber.config.js</code></p>

<div class="language-javascript highlighter-rouge"><div class="highlight"><pre class="highlight"><code><span class="nx">module</span><span class="p">.</span><span class="nx">exports</span> <span class="o">=</span> <span class="p">{</span>
  <span class="na">default</span><span class="p">:</span> <span class="p">{</span>
    <span class="na">format</span><span class="p">:</span> <span class="p">[</span><span class="dl">"</span><span class="s2">progress</span><span class="dl">"</span><span class="p">],</span>
    <span class="na">requireModule</span><span class="p">:</span> <span class="p">[</span><span class="dl">"</span><span class="s2">tsx/register</span><span class="dl">"</span><span class="p">],</span>
    <span class="na">require</span><span class="p">:</span> <span class="p">[</span>
      <span class="dl">"</span><span class="s2">./e2e/features/support/world.ts</span><span class="dl">"</span><span class="p">,</span>
      <span class="dl">"</span><span class="s2">./e2e/features/support/hooks.ts</span><span class="dl">"</span><span class="p">,</span>
      <span class="dl">"</span><span class="s2">./e2e/features/step_definitions/**/*.ts</span><span class="dl">"</span><span class="p">,</span>
    <span class="p">],</span>
    <span class="na">paths</span><span class="p">:</span> <span class="p">[</span><span class="dl">"</span><span class="s2">e2e/features/**/*.feature</span><span class="dl">"</span><span class="p">],</span>
  <span class="p">},</span>
<span class="p">};</span>
</code></pre></div></div>

<h3 id="2-define-the-cucumber-world">2. Define the Cucumber World</h3>

<p>Cucumber uses a “World” to share context between steps. Set this up in <code class="language-plaintext highlighter-rouge">e2e/features/support/world.ts</code>:</p>

<p><code class="language-plaintext highlighter-rouge">e2e/features/support/world.ts</code></p>

<div class="language-typescript highlighter-rouge"><div class="highlight"><pre class="highlight"><code><span class="k">import</span> <span class="p">{</span> <span class="nx">setDefaultTimeout</span><span class="p">,</span> <span class="nx">setWorldConstructor</span><span class="p">,</span> <span class="nx">World</span> <span class="p">}</span> <span class="k">from</span> <span class="dl">"</span><span class="s2">@cucumber/cucumber</span><span class="dl">"</span><span class="p">;</span>

<span class="nx">setDefaultTimeout</span><span class="p">(</span><span class="mi">60</span> <span class="o">*</span> <span class="mi">1000</span><span class="p">);</span>

<span class="k">export</span> <span class="kd">class</span> <span class="nx">CustomWorld</span> <span class="kd">extends</span> <span class="nx">World</span> <span class="p">{</span>
  <span class="nx">appLaunched</span> <span class="o">=</span> <span class="kc">false</span><span class="p">;</span>
<span class="p">}</span>

<span class="nx">setWorldConstructor</span><span class="p">(</span><span class="nx">CustomWorld</span><span class="p">);</span>
</code></pre></div></div>

<h3 id="3-set-up-hooks-for-the-detox-lifecycle">3. Set up hooks for the Detox lifecycle</h3>

<p>Now, create <code class="language-plaintext highlighter-rouge">e2e/features/support/hooks.ts</code> to handle Detox initialization, app launch, and cleanup:</p>

<p><code class="language-plaintext highlighter-rouge">e2e/features/support/hooks.ts</code></p>

<div class="language-typescript highlighter-rouge"><div class="highlight"><pre class="highlight"><code><span class="k">import</span> <span class="p">{</span> <span class="nx">AfterAll</span><span class="p">,</span> <span class="nx">Before</span><span class="p">,</span> <span class="nx">BeforeAll</span> <span class="p">}</span> <span class="k">from</span> <span class="dl">"</span><span class="s2">@cucumber/cucumber</span><span class="dl">"</span><span class="p">;</span>
<span class="k">import</span> <span class="p">{</span> <span class="nx">device</span> <span class="p">}</span> <span class="k">from</span> <span class="dl">"</span><span class="s2">detox</span><span class="dl">"</span><span class="p">;</span>
<span class="k">import</span> <span class="p">{</span> <span class="nx">cleanup</span><span class="p">,</span> <span class="nx">init</span> <span class="p">}</span> <span class="k">from</span> <span class="dl">"</span><span class="s2">detox/internals</span><span class="dl">"</span><span class="p">;</span>

<span class="nx">BeforeAll</span><span class="p">({</span> <span class="na">timeout</span><span class="p">:</span> <span class="mi">30</span> <span class="o">*</span> <span class="mi">1000</span> <span class="p">},</span> <span class="k">async</span> <span class="p">()</span> <span class="o">=&gt;</span> <span class="p">{</span>
  <span class="k">await</span> <span class="nx">init</span><span class="p">();</span>
<span class="p">});</span>

<span class="nx">Before</span><span class="p">({</span> <span class="na">timeout</span><span class="p">:</span> <span class="mi">30</span> <span class="o">*</span> <span class="mi">1000</span> <span class="p">},</span> <span class="k">async</span> <span class="p">()</span> <span class="o">=&gt;</span> <span class="p">{</span>
  <span class="k">await</span> <span class="nx">device</span><span class="p">.</span><span class="nx">launchApp</span><span class="p">({</span> <span class="na">delete</span><span class="p">:</span> <span class="kc">true</span><span class="p">,</span> <span class="na">newInstance</span><span class="p">:</span> <span class="kc">true</span> <span class="p">});</span>
<span class="p">});</span>

<span class="nx">AfterAll</span><span class="p">({</span> <span class="na">timeout</span><span class="p">:</span> <span class="mi">30</span> <span class="o">*</span> <span class="mi">1000</span> <span class="p">},</span> <span class="k">async</span> <span class="p">()</span> <span class="o">=&gt;</span> <span class="p">{</span>
  <span class="k">await</span> <span class="nx">cleanup</span><span class="p">();</span>
<span class="p">});</span>
</code></pre></div></div>

<h2 id="write-cucumber-features-and-step-definitions">Write Cucumber features and step definitions</h2>

<p>You’ll write feature files in Gherkin syntax, and step definitions in TypeScript, making use of Detox. Here’s a simple idea to get you started.</p>

<p><code class="language-plaintext highlighter-rouge">e2e/features/Greeting.feature</code></p>

<div class="language-gherkin highlighter-rouge"><div class="highlight"><pre class="highlight"><code><span class="kd">Feature</span><span class="p">:</span> Greeting

  <span class="kn">Scenario</span><span class="p">:</span> User enters their name and sees a greeting
    <span class="nf">Given </span>the app is launched
    <span class="nf">When </span>the user enters their name <span class="s">"chunky tofu"</span>
    <span class="nf">Then </span>they should see the greeting <span class="s">"Hello, chunky tofu!"</span>
</code></pre></div></div>

<p><code class="language-plaintext highlighter-rouge">e2e/features/step_definitions/greeting.ts</code></p>

<div class="language-typescript highlighter-rouge"><div class="highlight"><pre class="highlight"><code><span class="k">import</span> <span class="p">{</span> <span class="nx">Given</span><span class="p">,</span> <span class="nx">Then</span><span class="p">,</span> <span class="nx">When</span> <span class="p">}</span> <span class="k">from</span> <span class="dl">"</span><span class="s2">@cucumber/cucumber</span><span class="dl">"</span><span class="p">;</span>
<span class="k">import</span> <span class="p">{</span> <span class="nx">by</span><span class="p">,</span> <span class="nx">device</span><span class="p">,</span> <span class="nx">element</span><span class="p">,</span> <span class="nx">expect</span><span class="p">,</span> <span class="nx">waitFor</span> <span class="p">}</span> <span class="k">from</span> <span class="dl">"</span><span class="s2">detox</span><span class="dl">"</span><span class="p">;</span>

<span class="k">import</span> <span class="p">{</span> <span class="nx">CustomWorld</span> <span class="p">}</span> <span class="k">from</span> <span class="dl">"</span><span class="s2">../support/world</span><span class="dl">"</span><span class="p">;</span>

<span class="nx">Given</span><span class="p">(</span><span class="dl">"</span><span class="s2">the app is launched</span><span class="dl">"</span><span class="p">,</span> <span class="k">async</span> <span class="kd">function</span> <span class="p">(</span><span class="k">this</span><span class="p">:</span> <span class="nx">CustomWorld</span><span class="p">)</span> <span class="p">{</span>
  <span class="k">await</span> <span class="nx">waitFor</span><span class="p">(</span><span class="nx">element</span><span class="p">(</span><span class="nx">by</span><span class="p">.</span><span class="nx">text</span><span class="p">(</span><span class="dl">"</span><span class="s2">Welcome</span><span class="dl">"</span><span class="p">)))</span>
    <span class="p">.</span><span class="nx">toBeVisible</span><span class="p">()</span>
    <span class="p">.</span><span class="nx">withTimeout</span><span class="p">(</span><span class="mi">1000</span><span class="p">);</span>
  <span class="k">this</span><span class="p">.</span><span class="nx">appLaunched</span> <span class="o">=</span> <span class="kc">true</span><span class="p">;</span>
<span class="p">});</span>

<span class="nx">When</span><span class="p">(</span><span class="dl">"</span><span class="s2">the user enters their name {string}</span><span class="dl">"</span><span class="p">,</span> <span class="k">async</span> <span class="kd">function</span> <span class="p">(</span><span class="k">this</span><span class="p">:</span> <span class="nx">CustomWorld</span><span class="p">,</span> <span class="nx">name</span><span class="p">:</span> <span class="kr">string</span><span class="p">)</span> <span class="p">{</span>
  <span class="k">await</span> <span class="nx">element</span><span class="p">(</span><span class="nx">by</span><span class="p">.</span><span class="nx">id</span><span class="p">(</span><span class="dl">"</span><span class="s2">nameInput</span><span class="dl">"</span><span class="p">)).</span><span class="nx">typeText</span><span class="p">(</span><span class="nx">name</span><span class="p">);</span>
  <span class="k">await</span> <span class="nx">element</span><span class="p">(</span><span class="nx">by</span><span class="p">.</span><span class="nx">id</span><span class="p">(</span><span class="dl">"</span><span class="s2">submitButton</span><span class="dl">"</span><span class="p">)).</span><span class="nx">tap</span><span class="p">();</span>
<span class="p">});</span>

<span class="nx">Then</span><span class="p">(</span><span class="dl">"</span><span class="s2">they should see the greeting {string}</span><span class="dl">"</span><span class="p">,</span> <span class="k">async</span> <span class="kd">function</span> <span class="p">(</span><span class="k">this</span><span class="p">:</span> <span class="nx">CustomWorld</span><span class="p">,</span> <span class="nx">expectedGreeting</span><span class="p">:</span> <span class="kr">string</span><span class="p">)</span> <span class="p">{</span>
  <span class="k">await</span> <span class="nx">expect</span><span class="p">(</span><span class="nx">element</span><span class="p">(</span><span class="nx">by</span><span class="p">.</span><span class="nx">text</span><span class="p">(</span><span class="nx">expectedGreeting</span><span class="p">))).</span><span class="nx">toBeVisible</span><span class="p">();</span>
<span class="p">});</span>
</code></pre></div></div>

<h2 id="run-your-tests">Run your tests!</h2>

<p>You are now ready to begin running your Cucumber scenarios through Detox.</p>

<div class="language-bash highlighter-rouge"><div class="highlight"><pre class="highlight"><code>detox <span class="nb">test</span>
</code></pre></div></div>

<p>Or, if you want to specify a particular configuration:</p>

<div class="language-bash highlighter-rouge"><div class="highlight"><pre class="highlight"><code>detox <span class="nb">test</span> <span class="nt">--configuration</span> <span class="s2">"ios.sim.staging"</span>
</code></pre></div></div>

<p>This should launch an iOS simulator, load your app, and start running your Cucumber scenarios.</p>

<p>If you encounter issues with <code class="language-plaintext highlighter-rouge">tsx/register</code>, you can work around them by running Detox with this command:</p>

<div class="language-bash highlighter-rouge"><div class="highlight"><pre class="highlight"><code><span class="nv">NODE_OPTIONS</span><span class="o">=</span><span class="s2">"--import tsx"</span> detox <span class="nb">test</span>
</code></pre></div></div>

<h2 id="credit-and-appreciation">Credit and appreciation</h2>

<p>Thanks to the following people for their help:</p>

<ul>
  <li><a href="https://medium.com/@peters.jaydon">Jaydon Peters</a> for the post <a href="https://medium.com/@peters.jaydon/react-native-detox-and-cucumber-c2164a6eebd5">React Native, Detox, and Cucumber</a> which, while now outdated, gave me the hope that this could be done.</li>
  <li><a href="https://github.com/ExoMemphiz">Chris Rosendorf</a> for a lot of help figuring out the <code class="language-plaintext highlighter-rouge">tsx</code> things and wrangling the Detox internals. This would never have happened without all your help!</li>
  <li><a href="https://openai.com/">ChatGPT, powered by OpenAI</a> for providing helpful suggestions, tips, and guidance throughout the process.</li>
</ul>]]></content><author><name>Drue Wilding</name></author><category term="testing" /><summary type="html"><![CDATA[A working guide as of March 2025]]></summary><media:thumbnail xmlns:media="http://search.yahoo.com/mrss/" url="https://www.druewilding.com/assets/images/react-native-cucumber-detox/og-image.jpg" /><media:content medium="image" url="https://www.druewilding.com/assets/images/react-native-cucumber-detox/og-image.jpg" xmlns:media="http://search.yahoo.com/mrss/" /></entry></feed>